Please Don’t Heat Up the Kitchen New Recipe Challenge: Grilled Eggplant Parmesan

Please Don't Heat Up the Kitchen New Recipe Challenge

Recently, we made a recipe a reader sent me from the newspaper in Naples, Florida.  The truly odd thing was, shortly after I received the recipe, someone offered me a whole bunch of eggplant, and I was going to make it then, but things happened.

Namely the eggplant went bad before I could arrive to receive it.

But Kroger has been having a New Lower Price! for eggplant (which I NEVER purchase by the way) of 99 cents each.

So, one day, I just had to buy the eggplant to make this.  Well, it involved the grill, and only Josh knows how to operate the grill in our house, so I did all of the prep work, and Josh cooked it.

We ended up serving it as a side, but this could so be a main dish for a meatless meal.  We served it with buttery garlic mushrooms and pork chops.

It tasted awesome, but there are a few changes I would make.

  1.  Eggplant skin is very chewy/rubbery when grilled.  Think chewing on a rain slicker.  I would grill it skin on but remove it before I begin building the yumminess.
  2. Make extra breadcrumb topping so that you (as the cook) can crunch on some with a spoon.  I didn’t and I regret it.
  3. Make even more extra breadcrumb topping so that you can add more topping on top of the stacks.  Trust me.  The topping rocks!

So, here is the plate o’goodness:

IMG_3184[1]

Yes, it truly is as awesomely beautiful and vibrantly colored as was in the picture.

And here’s what (Josh and) I did:

Grilled Eggplant Parmigiana

Source:  Naples News/Banner

1 large eggplant

kosher salt

3/4 pound roma tomatoes (often called plum)

2 T extra-virgin olive oil, plus extra for brushing on the eggplant

1 largish clove minced garlic

1/2 cup panko breadcrumbs (Panko is like sweetened condensed milk.  All recipes with it are automatically awesome!)

1 1/2 ounces freshly grated Parm cheese (no Kraft green cylinder)

6 ounces mozzarella cheese, coarsely grated

fresh basil, shredded a la chiffonade, to garnish

(Note:  Just noticed that the recipe calls for you to peel the eggplant.  Oops!  I still think grilling it first and then peeling it would work best)

Slice the eggplant in rounds 3/4 inch thick.  Salt both sides of each slice, then set the slices aside for 45 mins.  Slice the tomatoes into 1/3-inch-thick rounds.  Salt both sides of each slice and transfer the slices to a rack to drain until the eggplant is ready.

Prepare the grill with a hot and indirect cooking side.

In a medium skillet (inside the house) over medium low, combine the measured 2 T oil and garlic.  Cook, stirring, until your mouth waters from the smell.  Add the panko.  Increase the heat to medium and cook until the crumbs turn golden and crunchy, 2 to 3 minutes, stirring constantly.  Transfer to a bowl, stir in the Parmesan cheese, and set aside.  Repeat so that you have plenty to taste test and some extra for the topping.

Pat the eggplant slices dry and brush one side of each with olive oil.  Add to the grill and cook over the hotter side until the slices are nicely browned on the bottoms, 5 to 6 minutes.  Brush the top sides with more oil, turn the slices over grill until browned on the second side, about another 5 minutes.  While the eggplant is grilling, pat dry the tomato slices.

Transfer the eggplant slices to the indirect heat on the grill, then top each slide with enough tomato slices to just cover the top.  Top the tomatoes with 2 tablespoons (or more if you made more) of the panko mixture, then divide the mozzarella cheese evenly among the slices.  Cover the grill and cook 4-6 minutes until the mozzarella is melted.  Transfer 2 slices to each of the four plates and top each portion with some basil.

IMG_3185[1]

What is your favorite grilled veg recipe?

Meal Plan Monday: Week 1 of a Returning Challenge

Meal Plan Monday

Versus

Please Don't Heat Up the Kitchen New Recipe Challenge

It’s that time of year again.  We need a respite from the summer’s heat.  So, I bring you Week 1 of the returning Please Don’t Heat Up the Kitchen New Recipe Challenge (more to come on the challenge Wednesday for We Plan Wednesday).

This week, my focus is two sources.  The first is another one of the Better Homes and Gardens Special Interest Publications (abbreviated below as BH&G SIP) Make and Take.  The other is a wonderful website that does the cost breakdown for recipes, Budget Bytes.

So, what’s up for this week?  Why, this, of course!

Saturday:  cookout with hot dogs and s’mores in the fire pit (Muffin has been dying to try s’mores)

Sunday:  grilled smoked sausage with peppers and onions

Monday:  Finger Lickin’ Barbecue Chicken (BH&G SIP Make and Take), beans, coleslaw

Tuesday:  Slow Cooker Rosemary Garlic Beef Stew (Budget Bytes), bread

Wednesday:  at my sister’s

Thursday:  at my sister’s

Friday:  leftovers or hot dogs

Saturday:  Slow Cooker Coconut Chicken (The Recipe Critic), rice, peas/beans

Sunday:  Asian-Style Barbecue Ribs (BH&G SIP Make and Take), fried rice, green veg (Father’s Day eats!)

What’s on your meal plan this week?  Oh, and if you have any recipes that need to make the list for the challenge, please let me know by dropping me a comment or two!  Thanks!  🙂

Please Don’t Heat Up the Kitchen New Recipe Challenge: Thumbs Up and Thumbs Down

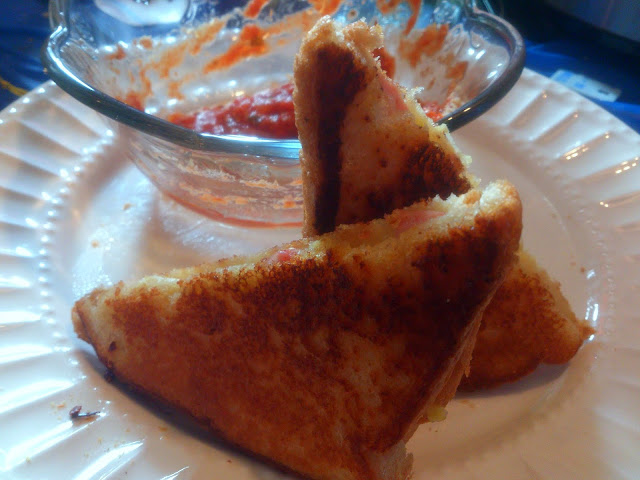
Please Don't Heat Up the Kitchen New Recipe ChallengeI’m trying to be more open about the bad.  I think I do okay opening up about the good, but this challenge has been…a challenge.  Monday I tried a new version of the Pizza Grilled Cheese Sandwich that I first saw on Forkful of Comfort.  I figured that a Hawaiian version would be great.  I love Hawaiian pizza (I especially love simply pineapple pizza), and it is a family favorite.  After the success of the salami version, I figured it would be AWESOME!  And it was.  Like totes.  🙂  Here’s the kicker:  it is the fastest recipe ever.  It takes as long as it takes to make grilled cheese.  And not being a fan of cheese singles, being able to use mozza really amps it up.  And…all I have to say is…pizza dipping sauce.  I swapped out the butter/margarine on the outside with mayo.  Mayo is easier to spread more evenly (none of the torn bread syndrome).

Think of this cheesy goodness.

I may have already consumed one of the two sandwiches before remembering to take a shot of second of the two sandwiches.  As in, it was so super yummy I felt the need to inhale consume it instantly.  Here’s what we did:

Hawaiian Pizza Grilled Cheese

bread, sliced (We used cheapy-cheap white bread)

butter, margarine, or mayo to slather on the bread (one side of each slice of bread)

shredded mozzarella (enough to layer on the bread twice

half a slice of thinly sliced ham (or Canadian bacon) per sandwich torn into bits

half a small can of crushed pineapple (and to keep the sandwiches flat enough it needs to be crushed), very well drained

jarred or canned red pasta sauce of one’s own choosing, warmed

Slather butter, margarine, or mayo on one side of each slice of bread.  Sprinkle a generous blanket on the un-coated side of half of the bread slices.  Sprinkle with ham and pineapple bits in an amount of your own choosing, but make sure to allow some of the mozzarella visible.  Sprinkle on more mozzarella.  Place the un-coated side of the remaining bread slices on top of the mozzarella.

Heat a nonstick skillet over medium heat until hot (You may want to spray the surface with nonstick cooking spray).  Place the sandwiches on the pan (being sure not to crowd too much).  Once the underside is browned and the cheese is partially melted, flip each sandwich carefully.  Cook until browned on that side and cheese is completely melted.  Cut diagonally into either two or four triangles (Muffin’s preference).  Repeat for remaining sandwiches.

Serve with warmed pasta sauce for dipping.

This was the thumbs-up portion of the week and definitely Muffin Approved.

That was the good news.

The thumbs down was my fault.

I attempted to make Josh’s Oma’s meatloaf in the slow cooker.  I had similar results to the Chicken Parmigiana meatloaf.  If you overcook meatloaf it turns kinda sour tasting.  If I had stopped at the five hours on LOW that I had it set for, but I didn’t think it looked quite done, so I set it for another hour.  It resembled dark brown leather afterwards.  I managed to choke down a slice, but Josh and Muffin couldn’t.  I do have to say this:  Oma’s meatloaf is yummy enough to deal with heating up the kitchen for.  Although the culinary adventuress within me wants to try it one more time and stop it at five hours.  I think it would have been awesome.

I didn’t take a picture.

Tomorrow we consume pancakes and bacon.  I plan to use the recipe from Miss Kay’s cookbook (because I like it the best) but to make sure I don’t use expired baking powder.

What is your biggest culinary achievement or disappointment lately?

Muffin Approved

Well…the pizza grilled cheese, at least.


Please Don’t Heat Up the Kitchen New Recipe Challenge: Homemade Welch’s Sparkling Grape Juice

Please Don't Heat Up the Kitchen New Recipe Challenge

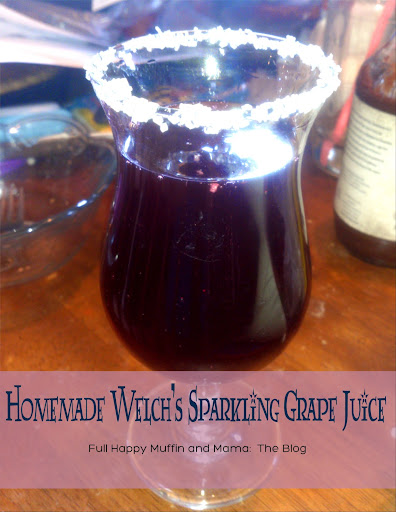
Could anyone simply bathe in Welch’s Sparkling Grape Juice as I could?  When I was younger, it was what we would drink on super special occasions (mostly because it was super expensive for what it is).  Recently, I found a recipe for Homemade Martinelli’s (which, as you know, is the apple juice equivalent) that calls for mixing thawed frozen juice concentrate with club soda.  Since the fizz in my SodaStream is on the fritz (basically I need to trade-in the cartridge), I had to make do with bottled club soda (which is never as carbonated as the SodaStream stuff).

But Muffin was really excited about the making of the grape soda.  As in, this was what I used to convince him to take a nap.  I told him, “After you take your nap, we will make grape soda.”

One very important thing to note:  there are usually two varieties of the Welch’s:  red grape and white grape, not Concord.  Have you tried to find red grape juice concentrate?  Uh…doesn’t happen.  So, I made do with Concord (purple) grape juice concentrate.  It gave things kind of a twang.

The recipe does note that you need to be very careful mixing the two because too much mixing can cause your soda to go flat.  Mine wasn’t as carbonated as I would have liked, but I knew the capability was there for it to be.

But Muffin loved it!  He especially loved making the silver-sugared rim for the presentation glass.  At supper time, he was being most insistent about it, asking over…and over…and over…where the grape soda was.

So, here’s what we did.

Homemade Welch’s Sparkling Grape Juice

Adapted from One Good Thing By Jillee’s recipe for Homemade Martinelli’s

2 Liters of club soda (each Soda Stream bottle makes one Liter, so you either need to prep two bottles or halve the recipe), as cold as it can get without being frozen

2 cans frozen grape juice concentrate, thawed (regular-sized, not the little half-cans), also as cold as you can make it without being frozen

Pour (GENTLY) into a gallon pitcher (unless you halve the recipe) the bottle of club soda.  Be sure to pour slowly and close to the surface to allow for less bubble breakage (trust me on this).  Pour grape juice concentrate in the same way.  Slowly and carefully mix the mixture so that the syrupy concentrate doesn’t fall to the bottom.  Transfer to a screw-top container.  Drink immediately or chill until COLD.

The stress on cold and gentle is what allows the soda to keep its carbonation.  The carbonation is key to this soda.  It’s what changes it from great to fantabulousness!

Now for the rim:

1 tablespoon cold water in a shallow, wide ramekin

1 tablespoon decorative sugar (I used silver decorative sugar) in a shallow, wide ramekin

Upend the glass in the water.  Lift straight up and allow to drip for a few seconds.  Press down and turn in the sugar, trying to make the rim even.  Fill with beverage of choice using a ladle.  Enjoy!

By the way, this post is when we are on the road to Canada!  Happy Sunday!

This recipe is SO Muffin Approved!

Muffin Approved

What occasions cause you to drink sparkling grape juice?

Please Don’t Heat Up the Kitchen New Recipe Challenge: Cucumber, Lemon, and Mint Spa Water

Please Don't Heat Up the Kitchen New Recipe Challenge

As today is the first day of summer (and we are traveling to Canada), I decided to front-load some posts during the duration of the trip.  Think of it as the cooking once, eating twice method of posts.  Some days I have tried out more than one recipe, and, rather than put my readers into post overload, I decided to save some of the posts for the road.

Don’t worry; I will still be checking in at night when we stop for the night and at my mother-in-law’s.

The first day of summer deserves a truly heat-free-kitchen recipe.  And a cooling recipe, at that.

For months, I have gathered spa water (or sassy water or flavored water–whatever you call it) recipes in hopes of obtaining one close to my first taste of spa water.  At one of Josh’s cousin’s weddings, the beverage of choice at the reception was a lemon-cucumber spa water that basically softened the taste of the water.  We have lots of mint growing in the yard, so I was hoping to find a lemon-cucumber-mint spa water recipe.  Well, I didn’t find one that quite touched it, so I decided to experiment to make my own.

And the results were yummers!  Very refreshing, especially for a confirmed pop drinker (or coke or soda, whatever you call it).  It tastes very cleansing, much like a day at the spa!

Cucumber, Lemon, and Mint Spa Water

From Me!

2 lemons, sliced and deseeded

1/3 cucumber, peeled in staggered rows so that strips of green peel appear on each ring, sliced thinly

1 sprig mint, slightly crushed in the hands, separated into individual leaves

half gallon filtered water

Layer first three ingredients in a half-gallon pitcher.

Muddle slightly with the back of a spoon (but not so much that the pieces are mangled).  Fill pitcher to top with filtered water.  Refrigerate at least two hours, but no more than 24 hours (because the pith from the lemons will make the water bitter).

Enjoy over ice with a mud mask or facial (if you’re lucky enough).

Muffin didn’t try this, so I do not know if it is Muffin Approved, but it is Josh and Muffin’s Mama Approved.

What is your favorite spa water combo?

Please Don’t Heat Up the Kitchen New Recipe Challenge: Chewy No-Bake Granola Bars

Please Don't Heat Up the Kitchen New Recipe Challenge

Once upon a time, I had intended to make these during the Spring Cleaning New Recipe Challenge.

We tend to go through a lot of bars, as Josh calls them.  He used to take two daily in his lunches to snack on before he started to reduce his sugary, starchy intake.  But I’ve been in a mood to have bars lately.  And I’ve seen TONS of recipes for homemade ones on the Pinteresting Blogosphere that got my creative juices flowing.  I mean seriously.  Mix oats and rice krispies with sticky goo and extras?  Sign me up!

And I’m not sure how my body would react to processed bars nowadays.

I did know that I wanted to make chewy, as opposed to crispy, bars.  And no-bake is preferable.  I decided on one from Money Saving Mom.

And I decided today was the day to make them because I wanted something a bit substantial (and homemade) for the trip up north.  Supposedly, they freeze well, as well, something I am going to test while we are gone (because my dad wants to try them…so I will freeze a few for him to try).  I made them into the long bar size as well as the squarish ones.  Muffin and I may have already sampled them.  I followed the recipe almost word-for-word from the original post, but there are a few cautions that I want to kind of stress as I go over the recipe.

Chewy No-Bake Granola Bars

From Money Saving Mom

2 1/2 cups Rice Krispies

2 cups quick oats (or 1 3/4 quick oats and 1/4 cup either wheat germ or graham cracker crumbs)

1/2 cup additional mix-in ingredients, optional (I used shredded coconut.  I plan on using the marshmallow bits next time.  You can also use chopped nuts, dried fruit, seeds, or candy pieces)

1/2 cup honey

1/2 cup brown sugar

1/4 teaspoon salt

2/3 cup peanut butter (I wonder what Biscoff would be like?)

1 teaspoon vanilla extract

1/2 cup chocolate chips (I used miniature)

Combine Rice Krispies, oats, and the additional mix-in ingredient in a large bowl.

In a saucepan, mix the honey, brown sugar, and salt.  Over medium-low heat (although I bumped it to medium after the sugar started to melt), stir until the mixture comes to a complete boil for 30-60 seconds (a bit longer is okay–do not skimp on this–otherwise your mixture will not come together).

Remove from the heat and stir in the peanut butter and vanilla until smooth.

Pour over the dry ingredients and mix well.  (I would use a silicon spatula or spoonula because this is a super-sticky mixture)  Let cool at least 10 minutes before mixing in the chocolate chips.  I didn’t and had a melty mess on my hands (but a yummy melty mess).

Press into a greased 9×13 pan and let cool before cutting into bars.  I made square-shaped ones and “granola bar stick” shaped ones.

Note:  I’ve found it best to spray measuring cups with non-stick spray before measuring honey or peanut butter.  It helps the ingredients empty “cleaner.”

As I said, next time I hope to use graham cracker crumbs and the marshmallow bits to make a s’mores-like bar.

The best part?  In addition to being Muffin Approved (and filling a Muffin who is notorious for wanting several snacks shortly before dinner), they don’t taste chemically.  That is something that is an issue with the store bought bars.  I can pronounce and identify each of the ingredients, too.

By the way, I’m going through and uploading PDFs of my recipes to GoogleDocs so that an easily printable version is available.  Click the button below to access how I made the granola bars.  You will start to see that button on many of my recipe pages (those that don’t already have a printable from RecipePage).

I am linking up at Tip Junkie’s No-Bake Recipes Link Party.

page01

What is your go-to bar recipe?

Muffin Approved


I’m linking up here:

Whipperberry


Please Don’t Heat Up the Kitchen New Recipe Challenge: BBQ Comfort Meatballs for the Crock Pot

Please Don't Heat Up the Kitchen New Recipe Challenge

Erm.  When adapting a recipe for the slow cooker, please remember that 1) if it is a meatball recipe 2) and if the meatball mixture is kinda “loose” when formed into balls and that you are supposed to chill them for a bit to 3) follow those directions or possibly even freeze the mixture after portioning into balls for longer.

Basically it turned into clumpy meaty BBQ meat sauce.  That is perfectly okay.  But it is not the delightful round bally goodness I had intended.  When I first made these for the Spring Cleaning New Recipe Challenge, I decided I needed to double the sauce.  Which I did.  Which helped.

Otherwise, I followed the meatball mixture recipe.

And here was Muffin’s plate.

Still tasty.  Still Muffin Approved.  Just…not as I had hoped.

Oh well.  I will attempt another attempt at another time.

If you wish to follow my original post and how I made it originally in the oven with ingredients, you can find it here.  Of course, the place where I found the recipe was Pioneer Woman.

In other news, the leftover English cucumber slices were still yummy.

Muffin Approved

Not to be a Negative Nellie, but have you had any recipe failures (for adaptations or any other reasons)?

Please Don’t Heat Up the Kitchen New Recipe Challenge: Chef Salad with Honey Mustard Dressing

Please Don't Heat Up the Kitchen New Recipe Challenge

Muffin has been doing better eating salads lately.  Before a few weeks ago, he would say that he didn’t “yike” (like) “sayad” (salad)…meaning lettuce.  He loves some of the other components of salad, especially main dish salads, like meat…and cucumbers…and cheese…and tomatoes.  Recently, though, he has started stealing lettuce leaves off of anyone’s plate…his dad’s…my dad’s…mine…and munching.  Josh and I are definitely going through a salad phase…especially on days when it seems to hot and muggy for anything else, like yesterday.

I was super jazzed when I found a recipe for honey mustard dressing recently on Life in the Lofthouse.  Josh loves honey mustard dressing, but my few attempts at making it have been…well…let’s just say epic fail doesn’t quite cover it.  This recipe was really smooth, creamy, and delish!  (Plus, the chef salad that she photographed to put it on was beautiful.)

Of course, I had to change it up.  (Yes, I hear you groaning and grumbling)  First of all, hard boiled egg doesn’t seem in the spirit of the challenge.  And I don’t really have much luck hard boiling eggs.  And they kind of freak me out unless they are deviled or smooshed up really fine in cornbread dressing or salads.  As in…don’t let me see chunks or slices.  Let’s just chalk it up to a REALLY bad school cafeteria tuna salad experience (where they left very identifiable slices of hard boiled egg in).  And the grape tomatoes I binge purchased are starting to go a bit south.  And I had English cucumber.  And thin sliced ham and turkey (although I did purchase the correct varieties).  So, I apologize that mine is not as picture perfect.

On the honey mustard front, I did not have any poppy seed dressing (or, if I do, it is somewhere in the bowels of the fridge), but when you leave it out, it makes it more traditionally honey mustard.  It’s just not as picturesque as Life in the Lofthouse’s version.

By the way, this recipe was so Muffin Approved.  When Josh and I were finished eating, he was still munching away.  We served his dressing on the side so that he could dip.

Here’s my version of the events.

Chef Salad with Honey Mustard Dressing

Adapted from Life in the Lofthouse

1/4 pound honey ham, sliced and then diced

1/4 pound oven-roasted turkey breast, sliced then diced

1 English cucumber, sliced in thin slices

1 head Romaine lettuce, ribs removed from leaves and then leaves shredded

1 cup grape tomatoes, quartered lengthwise

1 cup cheddar cheese, shredded (don’t use pre-shredded)

Arrange attractively on plates.  Drizzle with honey mustard dressing.

Honey Mustard Dressing

1/2 cup mayonnaise

1/4 cup prepared yellow mustard

5 tablespoons honey

Whisk together mayonnaise and mustard until creamy.  Drizzle honey over mixture and whisk again to blend.  Serve over salad or as a dip for chicken fingers.

Muffin Approved

Please Don’t Heat Up the Kitchen New Recipe Challenge: Simple Crockpot Chicken and Dumplings

Please Don't Heat Up the Kitchen New Recipe Challenge

(Ducks the arrows that I know are coming)  My grandmother was known for her chicken and dumplings.  My sister continued to perfect my grandmother’s chicken and dumplings after she was married.  My uncle made chicken and dumplings before he passed away.

This is not their chicken and dumplings.

I do plan on posting my sister’s/grandmother’s/uncle’s version once the weather cools down and I need to heat up the kitchen and the rest of the house.  For today, I am relying on a slow cooker version from the Slow Roasted Italian.  There are elements that are (sorta) close to my grandmother’s version, although my grandmother did not add bay leaves, parsley, poultry seasoning, or onion powder.  This is not as veggie filled as some versions (my grandmother’s included no veggies and was usually served with a version of a salad).  There are a few (glaring) differences.  Grandmother always used a whole cut-up chicken.  This recipe calls for boneless skinless breasts.  She boiled the chicken in water to make the broth that was used as the backbone of the sauce.  This one calls for canned or homemade broth separately and the chicken cooks in the sauce.  My grandmother’s recipe uses cut dumplins (no, that is not a typo).  This one uses scooped ones.

The cooking actually finished closer to 2:00, but I hadn’t eaten lunch yet (and knew I had to try them).

Update:  I have now eaten them.  And although I love my grandmother’s chicken and dumplins (now my sister’s chicken and dumplins) best, I’m okay with these as a Please Don’t Heat Up the Kitchen substitute.  I am a bit undecided on the drop dumplins.  I think I might need to use my grandmother’s actual dumplin recipe and cut them in strips so that they will be more familiar.  These were a bit doughy…think really big gnocchi…cloud shaped and puffy.  Still, I liked them.

I actually kept (fairly) close to the original recipe (hahaha), but I did make a few alterations (namely using up things and leaving out some things I don’t normally have in the kitchen).  Follow along with the original if you want to see where I veered.

Simple Crockpot Chicken and Dumplings

Adapted (pretty strictly) from the Slow Roasted Italian

2 pounds boneless skinless chicken breasts, uncooked

2 cans cream of chicken soup (I really want to do the homemade kind next time and use three cups of that)

4 cups chicken broth

1 1/4 cups chicken stock

3/4 cup evaporated milk

1 chicken-flavored bouillon cube

3 tablespoons butter

2 teaspoons onion powder

2 bay leaves

1 teaspoon parsley flakes

1/2 teaspoon fresh ground black pepper

1 recipe dumplings

In your slow cooker, soup and the seasonings (except for the bay leaves).  Stir in melted butter.  Slowly add in broth/stock/evaporated milk, stirring to remove lumps.  Stir in bay leaves and place in chicken breasts.  Cover and cook on high for 5 hours, stirring occasionally.  I had to go out of the house for most of this process, so I only stirred once an hour before the timer went off.  Remove chicken and shred it, returning it to the slow cooker crock.  This is easy since the chicken is tender from the slow cooking.  Add dumplings with a tablespoon scooper (I would use something smaller), and cook on low for 1 hour.  Do not stir until done cooking.

Dumplings

2 cups flower

1 tablespoon baking powder

1/2 teaspoon kosher salt

1 tablespoon butter

3/4 cup milk

1/4 cup water (I eyeballed the 3/4 cup in a one-cup measuring cup and added in water to the top)

Combine first three ingredients.  Using finger tips, massage in butter until the mixture is the consistency of clumpy cornmeal.  Stir in liquid ingredients with a fork until a ball forms.

To me, chicken and dumplins is the ultimate comfort food.  We often served it with a special salad (that I hope to make and post shortly).

This recipe is Muffin Approved.

What is your favorite comfort food?

Muffin Approved

Please Don’t Heat Up the Kitchen New Recipe Challenge: Slow Cooker Hawaiian Pork

Please Don't Heat Up the Kitchen New Recipe Challenge

How many people believe I followed last night’s recipe correctly and word for word?  (Crickets chirping)  Good, everyone has learned that I seem incapable to follow most recipes in the challenge word for word.  The recipe in question is New Leaf Wellness’s Slow Cooker Hawaiian Chicken for the Freezer.  All I can say is ummm….and then mmmmmmmm…because it was yummy…even though I didn’t follow the recipe.

We are big fans of sweet and sour chicken and pork in our house.  And pineapple (Muffin has been known to eat most of a fresh pineapple in one sitting).  And he did like this recipe.  Josh and I agree that I probably should have added a slurry of cornstarch and water to the sauce to make it thicker and more unctuous.  But again, that’s all on me because I didn’t follow the recipe exactly.

First of all, I didn’t have the time or the patience first thing upon returning from buying and putting away groceries yesterday to prep a fresh pineapple (also Muffin would be hugely upset if I didn’t let him eat said pineapple by himself).  Second, I had already decided to use canned pineapple and had previously purchased the canned pineapple for the dish.

Second, I had the remaining pound of pork tenderloin tips from the pork tips over rice to use up before they went bad.  (And I prefer sweet and sour pork to chicken any day)  And I had a bell pepper and green onions that I needed to use up, and they were just crying to go in the slow cooker.  No, really, they were.  And they made all the difference.

So, follow along for fun with the original and see how I changed it.  Because I did.  A lot.

The beauty of this one, though, is that ‘Red could get in on the action, it’s a freezable slow cooker meal, and it’s a set-in-and-forget-it one.  You don’t have to babysit it.  However, if you use one like ‘Red, I would recommend being home all day (or at least in time to set it to warm at 6 hours…or use a digital model that automatically goes to warm after cooking is done).

Here…we…go!

Slow Cooker Hawaiian Pork (for the freezer)

Adapted from New Leaf Wellness

1 pound pork loin (or tenderloin), cut into bite-sized pieces (or 1 pound boneless, skinless chicken breasts)

28 ounces of canned diced or chunk pineapple (one large can and one small can), undrained

2 tablespoons light brown sugar

2 tablespoons soy sauce

3 green onions, cut in half-inch diagonal cuts

one bell pepper, cut into half-inch chunks

slurry made with one tablespoon cornstarch and one tablespoon cold water

cooked white or brown rice

(If prepping for the freezer, place all ingredients except pork into gallon-sized zippy bag.  Plop the meat on top.  Remove as much air as possible from the freezer bag, seal, and place in freezer.  The night before cooking, move frozen bag to the fridge to thaw.  Then, the morning of cooking, pour contents of freezer bag into your slow cooker).

(If cooking immediately).  Mix the brown sugar, undrained pineapple, and soy sauce in the crock of your slow cooker.  Stir in meat and veggies.

Cover and cook on LOW for 3-6 hours, or until meat is cooked through and tender.  After that, pour the slurry into the slow cooker, stir, and turn the heat up to HIGH long enough for the mixture to bubble and the sauce to thicken.  Serve over rice.

What is your fave slow cooker freezer meal?

Muffin Approved