Meal Plan Monday: Theme Nights?

Meal Plan Monday

I’m a bit obsessed with planning meals.  Or to be more general, I’m obsessed with thinking about food.  Meal planning gives me a reason (okay, an excuse) to think about food constantly.  Constantly.

Really, constantly.

At some point last year (about this time of year, actually), I became obsessed with planning out alliterative theme nights.  Like meatless Monday and Taco Tuesday.  I really stretched it some though.  It may have been sleep deprivation.  Or work stress.  I’m not sure which of the two were the culprit or both.  It also happened to be during a Pinterest blitzing (where I would wake up at 2 a.m. and not be able to go to sleep and pin solidly for three hours in an attempt to go to sleep which of course did not work).

But, today, you get to enjoy the (slightly warped) fruits of my labor.  Enjoy!


Sunday

Sunday dinner:  big meal, possibly with planned leftovers

Souper Sunday (also works for Saturday):  soup, stew, chili (with salad or sandwiches)

Slowcook Sunday (also works for Saturday):  meals from the slow cooker

Spaghetti Sunday (also works for Saturday):  spaghetti or any Italian food (or macaroni and cheese)

Skewer Sunday (also works for Saturday):  kebabs or meals on a stick (or grilled eats)

Southern Sunday (Saturday also):  southern edibles

Schezwan Sunday (Saturday also):  Asian food (particularly Chinese)

Spanish Sunday (Saturday also):  Spanish or Hispanic food (including tapas–yum!)


Monday

Meatless Monday:  vegan, vegetarian, beans and rice, etc.

Mediterranean Monday:  Spanish, Turkish, Greek, or Italian cuisine

Microwave Monday:  leftovers

Mexican Monday

Red Beans and Rice:  In New Orleans, red beans and rice were traditionally served on wash day–Monday.

Meatloaf Monday

Movie Monday:  meals inspired by movies (and I had dozens of those selected–some in one of the date night posts–and plan to post more later)

Mom’s Munchies Monday:  parental eats/heirloom recipes or snacky meals

Manitoba Munchies:  Canadian eats

Muffin Tin Monday:  petite eats or meals in a muffin tin

Mystery Mondays:  eat meal blindfolded and try to guess it


Tuesday

Taco Tuesday

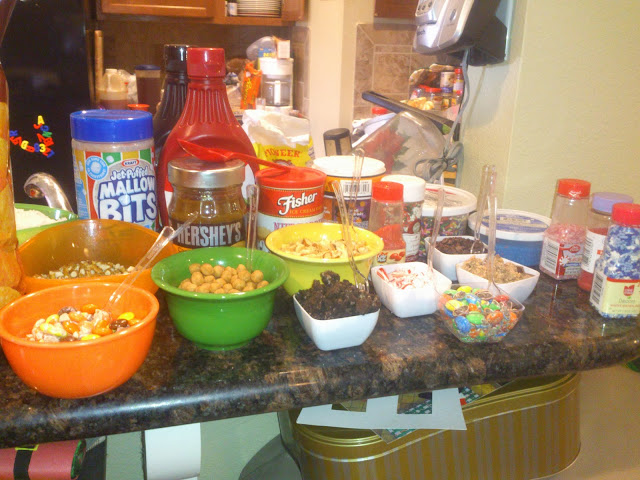
Terrific Trough Tuesday:  food bars

Tuna Tuesday:  tuna or other fish

Tiny Tuesday:  petite eats or snacky

Tuscan Tuesday:  Italian

Travel Tuesday:  foreign food (maybe progressive dinner of different ethnicities)

Tokyo Tuesday:  Asian food, particularly Japanese (sushi or faux sushi or sushi bowls)

Top Secret Tuesday:  copycat recipes

Television Tuesday:  TV-style dinners (either frozen dinner-style dinners or dinners themed around a particular television show)

Tea Party Tuesday:  tea party style eats (think high tea)


Wednesday

Wacky Wednesday:  fun food/kid-friendly food (also could be called Weird Wednesday)

Wee One Wednesday:  kid-friendly

Warm Wednesday:  comfort food

Waste Not Wednesday:  leftovers or re-purposed leftovers

Windsor Wednesday:  British fare (also Irish, Australian, Scottish, Indian–all areas ever under British control)

Weber Wednesday:  grilling

Waffle Wednesday:  breakfast for dinner

Wild Card Wednesday:  anything goes


Thursday

Thrifty Thursday:  leftovers, cheap eats, use up last bits (think soups or fried rice)

Thin Thursday:  thin/small food or healthy food

Theater Thursday (or Theatre Thursday, if that is your bent):  movie-inspired menus (or meals that you could eat at a theater)

Thank You Thursday:  dishes you would eat at Thanksgiving

Three Course Dinner Thursday:  appetizer/salad/soup, entree, dessert

Fete de The Thursday:  That’s supposed to be French for “tea” and not “the” by the way–tea party eats


Friday

Fun Friday:  kid-friendly/fun foods

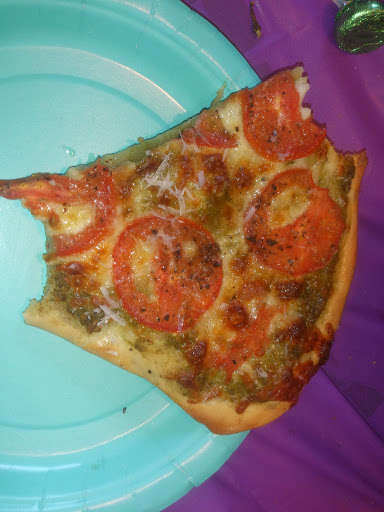
Pizza Night Friday Night:  pizza in all varieties/forms

Frenchy Friday:  French foods or foods misattributed to the French (loaded, smothered cheesy French fries, for example)

Fried Friday:  fried foods

Fish on Friday:  fish (duh!) or goldfish crackers in soup or salad

Film Friday:  see Movie Monday or Theater Thursday

Fondue Friday:  all things dippable

Fiesta Friday:  party eats (appys) or Hispanic food

Freezer Friday:  something from the freezer or (in the heat of summer) something chilled

Fancy Friday:  fancy/elegant eats

Fast Friday:  quick to prepare or fast-food-inspired

Frugal Friday:  see Thrifty Thursday

What others can you come up with?

Anyway, here’s what you came for (and as always I’m linking up with OrgJunkie.com’s Menu Plan Monday):

Monday: clean out fridge/hot dogs

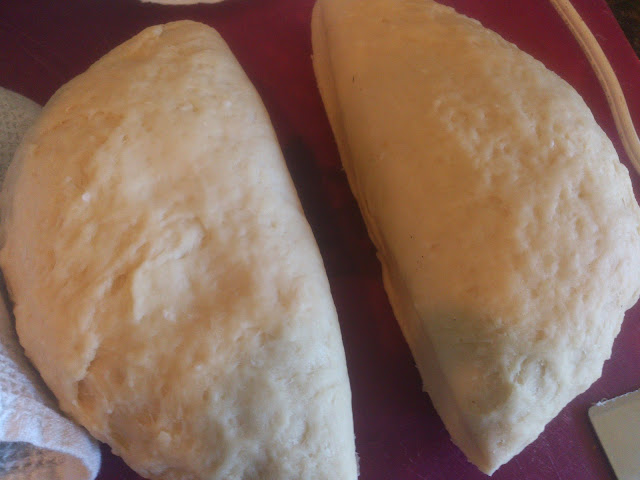
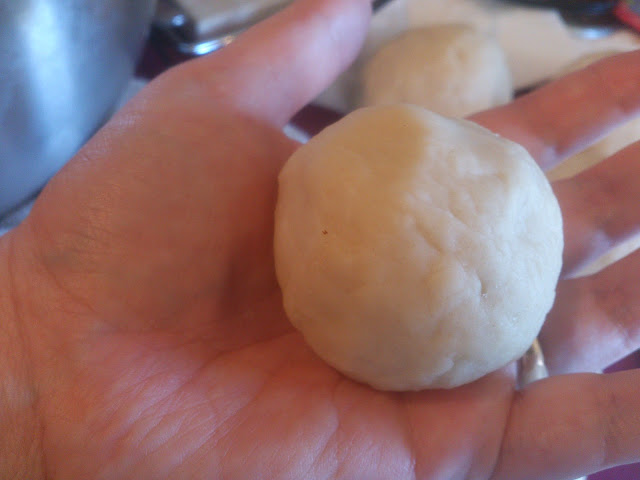
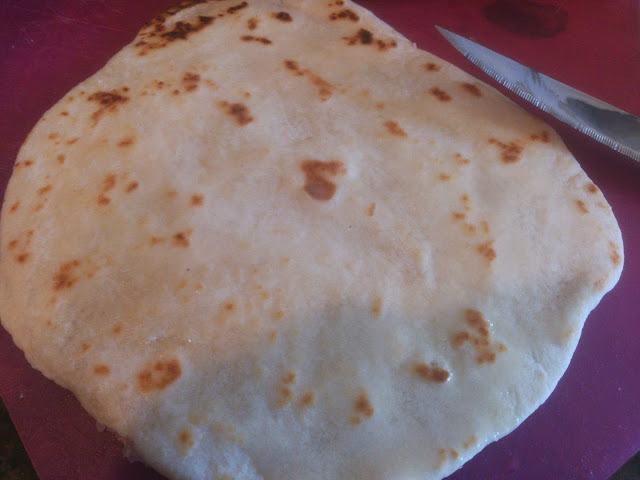
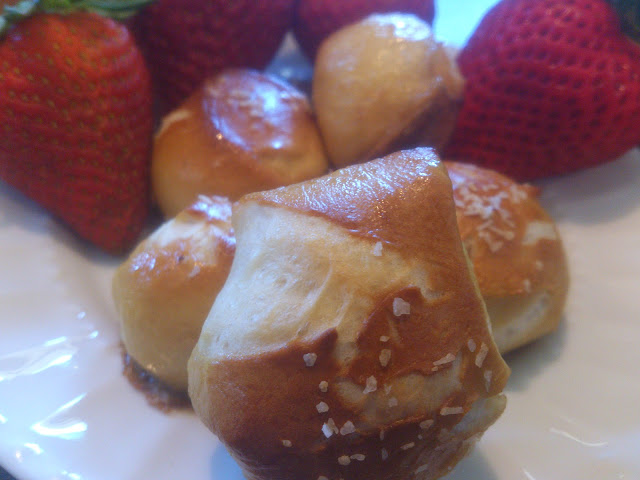
Tuesday: tacos (make tortillas)

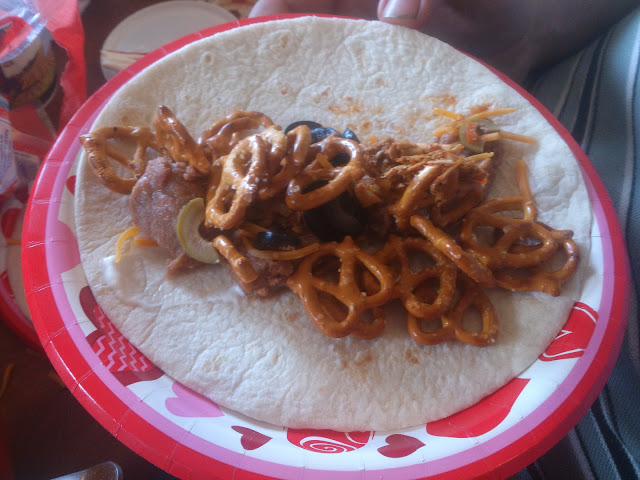
…although hopefully not with pretzels!

Wednesday: stuffed baked potato (taco toppings, bacon, etc)

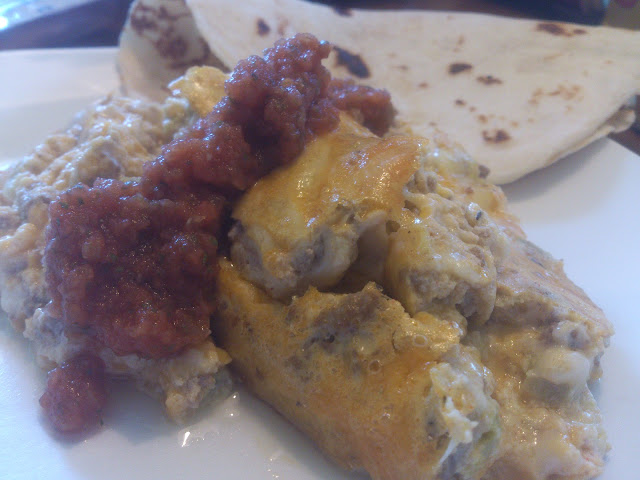
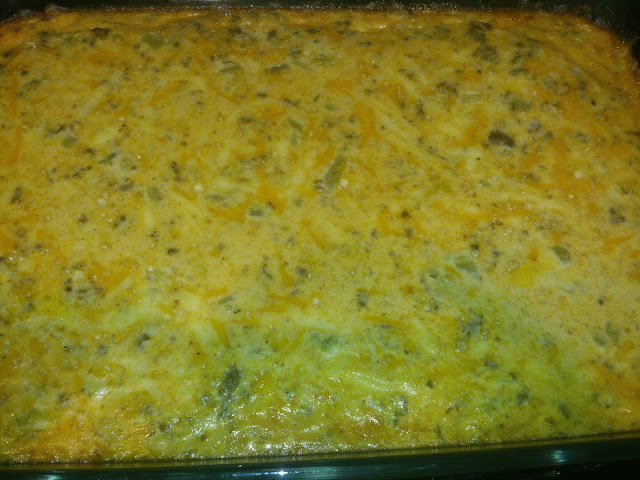
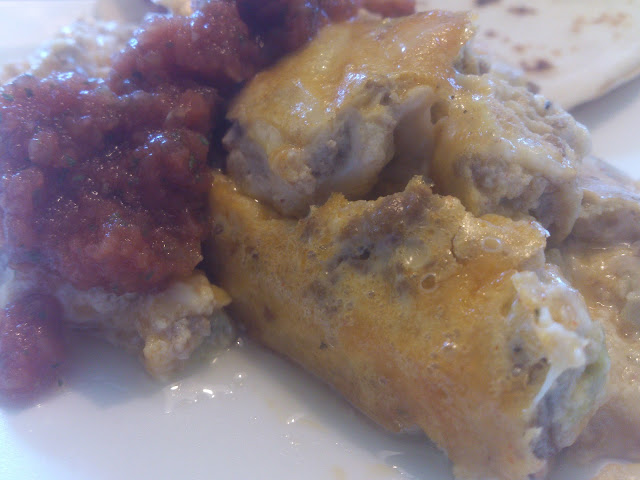
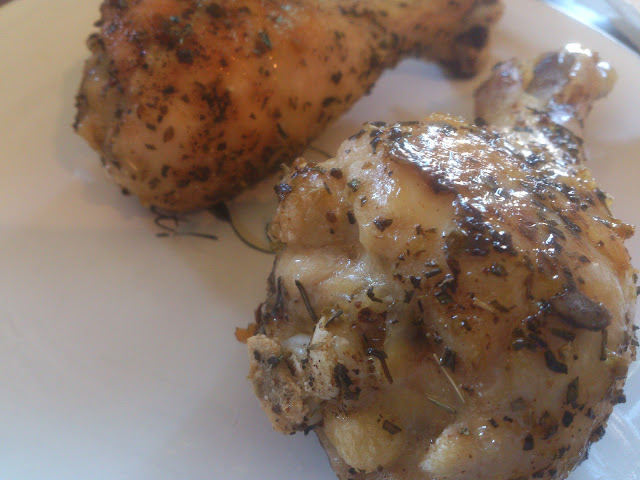
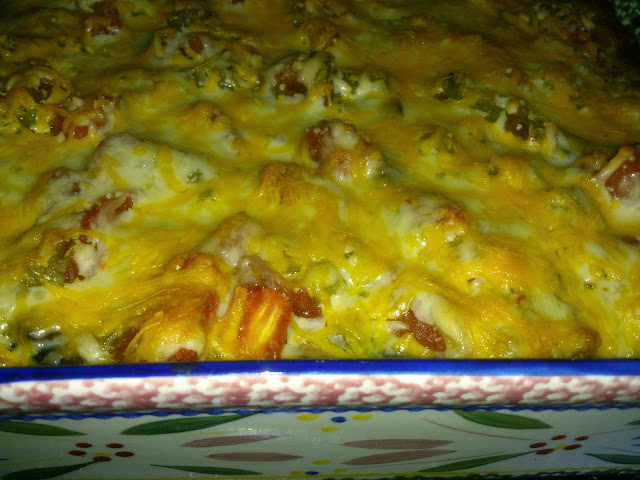
Thursday: Leftover casserole (cowboy chicken), frozen veg or chips and salsa

Friday: 2 ingredient pizza dough pizza

Saturday: grill stuff

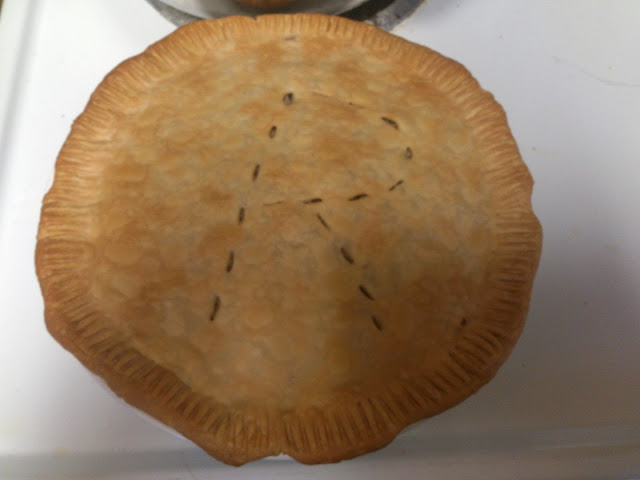
Sunday: tourtiere, veg, mashed potatoes and gravy

I am linking up with Menu Plan Monday at OrgJunkie!


This week I’m also linking up at the Thoughtful Spot Weekly Blog Hop:

The Spring Cleaning New Recipe Challenge: The End of the Line

New Recipe Challenge

I end this week (which coincided with my Spring Break at work) on a bittersweet note.  Muffin and I really got to spend some Mama-Muffin bonding time (and discovered we both enjoy bedtime snuggles while he looks at books or plays games or has me read him a story) and shared some fun Mama-Muffin cooking moments in the kitchen (such as his pride in cracking eggs…and my terror of him doing so!).  And the moment I had to remind him that I had to head back to work on Monday, and he begged me to stay home.  The pain of being a working mom.  The joy of watching him continue to diligently use the potty during waking hours.  Each visit brought with it another measure of sweet success!

And for the challenge:  I learned so much–about cooking, about blogging, hopefully about photography, and myself–in this challenge.  I took risks that I had always been unwilling to take–3 slow cooker dishes in one week!–and lived to tell the tale.  I had several successes and a few near misses that will involve lots of tweaking.  I commented like crazy on blogs with supportive words and received kind words in return.

I really allowed my culinary experimentation to stretch (the Frenchy Toasty bread pudding bar!) and thought up a few other possibles to challenge myself with in the future (the Turtle Cream Puffs).  I definitely see myself doing a summer-themed challenge in the future.

From beginning to end, here are the recipes that were featured in the Challenge (see the Recipe Index page for the links):

Crock Pot Honey Garlic Chicken

Crock Pot Low Country Boil

Paula Deen’s Banana Bread

Le Pop-Corn du Sel et Poive (Salt and Pepper Popcorn)

Cowboy Chicken Casserole

Emeril’s Southwest Seasoning

Barbie Lemonade Spritzer

Cinnamon Sugar Biscotti

Quick and Easy Cheeseburger Pies

Hamburger Topping Salad

Easy Peanut Butter Fudge

Monterey Chicken

Parmesan Garlic Toast

Condensed Cream of Chicken Soup

Homemade Ranch Seasoning

Peas and Peppers

Crock Pot Ranch Pork Chops

Homemade Hamburger Buns

Monterey Chicken Sandwiches

2-Minute Frenchy Toasty Bread Pudding in a Mug

Roasted Fowl

Poached Pears

Soft Pretzel Bites

Chilies Rellenos Bake

That’s 23 new recipes in 9 days!

But, onto the offerings of today.  I made an old favorite, but I tweaked it.  From LivingOnaDime’s book (considered sometimes to be my cooking Bible), Dining on a Dime, I made the flour tortillas today for Tuesday’s tacos (that you will see tomorrow).  I made one-and-a-half times the recipe and I swapped out the shortening for all butter.  I divided the resulting dough into sixteen pieces to make sixteen tortillas.


Flour Tortillas

Adapted from Dining on a Dime

All butter with a thin coating of butter waiting impatiently to be eaten!

4 1/2 cups flour

1 1/2 teaspoons salt

1 teaspoon baking powder (I accidentally doubled the amount in the original which resulted in fluffier, softer tortillas)

3/4 cup butter (1 and 1/2 sticks)

1 cup + 2 tablespoons warm water (I used water warmed from the tap)

Place all ingredients except water in the Ninja blender-sized container or the work bowl of a food processor.  Process/blend until the consistency of oatmeal.  I actually took it a bit farther because it’s harder for me to tell with the Ninja.  It was pretty much a softened, slightly moistened, consistency of baking mix.

Dump the mixture into a large mixing bowl and pour water over it.  (Here’s the fun part.  Make sure to remove all jewelry.  I keep forgetting to remove my ring in making recipes like this, and it gets all gloopy.)  Blend with fingers.  Knead on a plastic cutting board for five minutes.  For me this is the most strenuous part because I have ZERO upper body strength.

Shape mixture into a ball.  Return the mixture to the mixing bowl and cover with a tea towel.  Let rest for half an hour.  Take this opportunity to rest as well.

After half an hour, divide the ball into four wedges with a bench scraper, a pizza cutter, or a butter knife.  I used my bench scraper this time.  Roll each wedge into a ball.  Divide each of those balls into four wedges and roll into balls.  Place the balls onto a cookie sheet and cover again with the tea towel.  Rest the balls 45 minutes (and really rest up if you didn’t before).

Volunteer your spouse for this next part.  One person needs to be rolling out the tortillas; the other needs to be cooking them.  The cooking process goes very quickly, and the rolling process sometimes…doesn’t.  Especially in the first few attempts of making these.

To flatten the balls:  Using the same plastic cutting board, use your hand and knuckles to flatten the ball into a fairly flat disk.  Using a rolling pin, flatten the disk out as much as you can (1/16-1/8 inch).  Remember the dough has baking powder; it’s going to puff a bit when it hits the heat.  Turn it 90 degrees after each rolling and flip it over.  I didn’t need to flour my surfaces, but you might have to if your rolling pin isn’t fairly nonstick.

Meanwhile, put a (not non-stick) skillet over medium-high heat and let it get HOT.  After it is hot, you can back it down to medium heat, but the point is to get the pan hot enough to cook one side on its own.  Place the flattened dough in the pan.  It will start to bubble up immediately.  Press the top surface to collapse some of the bubbles and help it cook more evenly.  After no longer than 30 seconds (and for the first few probably less), flip the tortilla.  The goal is to have some patches on the cooked surface that are slightly browned.  If you allow them to get burned, they will not be soft.

Evacuate the tortilla to a plate.  They keep covered for a couple of hours.  You can also refrigerate them for a few days or freeze them for up to two months.

Verdict:  I prefer homemade tortillas and get pouty when I have to buy them (time constraints).  They do require a bit of muscle, but they are worth it.  And the all butter and pumped up baking powder level took them to levels unknown.  And having Josh do the cooking of them while I rolled them out really helped!

(With Carol’s salsa and slathered in butter)  Note:  The crepe recipe that I love to make so much is on the facing page of Dining on a Dime from the flour tortillas.


The true finale for the Challenge came at suppertime tonight.  I needed to end it on something Tex-Mex and a casserole (because it’s getting to that time of year when there aren’t going to be many casseroles because of the infernal heat).  I also wanted to give some props to a blog that I discovered recently, Love Bakes Good Cakes.  It was the Chilies Rellenos Bake.  The best Chilies Rellenos I’ve ever had was at, oddly enough, the Panchos Buffet.  So, I was hoping that it would live up to that (flavor-wise).  The dish is intended to be vegetarian, but I added a bit of browned ground beef (from the meat factory bee-sheen) flavored with Emeril’s Southwest Seasoning (which works pretty well as a makeshift taco seasoning) to please my carnivores.  It was a fitting end to the challenge.  Muffin liked it (it’s very cheesy) and Josh did, as well.  I figure I can use different meats in it and maybe, hopefully, someday make it as it was intended (as a vegetarian dish).

Chilies Rellenos Bake

Adapted from Love Bakes Good Cakes

1/2-3/4 pound ground beef, browned and crumbled

1 tablespoon Emeril’s Southwest Seasoning

8 eggs, beaten

1 cup sour cream

1/2 teaspoon salt

1/2 teaspoon freshly ground black pepper

several drops Louisiana hot sauce (or 1-2 drops of Tabasco)

2 cups shredded Monterey Jack cheese

2 cups shredded sharp cheddar cheese

2 cans chopped green chilies, undrained

Preheat the oven to 350 degrees.

Whisk together eggs and sour cream until homogenized and custardy.  This will take a couple of minutes.  Add salt, pepper, and hot sauce.  Combine ground beef and southwest seasoning in the skillet.  Add cheeses and chilies to the egg mixture.  A few tablespoons at a time (to avoid curdling the eggs), add the hot ground beef mixture.  As the eggs become tempered, you may add more amounts at a time, folding in each addition.

Pour the mixture into a greased 9×13-inch glass/Pyrex pan.  Bake at 350 degrees for 45 minutes.

Here are some more photos from the “Bake”:

Th-th-th-that’s all, folks!

How did your week of cooking go?

And did I mention that both of these recipes were Muffin Approved?

Muffin Approved


The Spring Cleaning New Recipe Challenge: Soft Pretzel Bites (The Slow Roasted Italian)

New Recipe Challenge

I may have mentioned already that I love The Slow Roasted Italian’s website, haven’t I?  Everything pretzel and buffalo, plus lots of sips and eats to warm the tummy.

I had originally intended to make this recipe Friday (when I wasn’t planning a new recipe and didn’t feel like cheating everyone), but the Homemade Hamburger Buns intervened.

Not to change the subject (at all), but I try to make sure that Muffin isn’t with me when I go to Walmart during midday to night because invariably I hear this plaintive cry, “I wanna prentz-ul!”  And, to save the ears of everyone in the tri-state area, I tend to give in WAY TOO OFTEN.

That’s why I was super jazzed when I ran across this recipe by The Slow Roasted Italian herself:  Soft Pretzel Bites.  A recipe that requires no rise time (the only one I’ve found that doesn’t), so if you have your game on (and I didn’t), you can finish the recipe, start to finish, in 30 minutes.  Seriously.  I did not have my game on, so it took closer to an hour, but if I can hold homemade pretzel bites over Muffin’s head (offer Muffin the option of helping me make homemade pretzel bites, I mean), we might leave Walmart without shelling out the big bucks to Auntie Anne’s (yes…an Auntie Anne’s inside Walmart…that’s cruelty to parents).

We all got into the action making these, and, as I said, if we had prepared a bit beforehand, it would have gone much faster.  I followed the recipe on The Slow Roasted Italian verbatim, but next time I would probably brush them with butter instead of egg wash for salting.  The eggy taste was a bit prominent.  We had these for lunch with pepperoni slices (I know; totally healthy, right?) and strawberries.  Josh and Muffin ate theirs with cream cheese (Josh discovered the joy of stuffing his with cream cheese) and I ate mine straight up with yellow mustard.  Here’s a picky of the yummy results.

This is Muffin’s plate.

…and my plate!

Makes ya just kinda want one right now, doesn’t it?

Here’s what I did (The Slow Roasted Italian does mention options for those without stand mixers, but I figure you want to learn from my mistakes):

By the way:  The recipe makes 64 bites.  After about five, I started to get full.  They puff up bigger than the pretzel bites at Auntie Anne’s.  And, if you do butter instead of egg wash (since it would be difficult to half an egg), you could easily half the recipe.

2 1/4 teaspoons active dry yeast (I used the yeast from Sam’s.  I have moved it to a zippy bag, so I’m not sure if it’s active dry or not, but it really worked.)

1 1/4 cups warm milk (110-120 degrees Fahrenheit)  I put mine in a Pyrex cup for one minute in the microwave on high.

2 tablespoons honey (remember:  local is best!)

3 1/4 cups flour (plus possibly more on standby if the dough is too sticky)  I only used 3 1/4 cups.

1 teaspoon kosher salt

1/2 cup baking soda

1 large egg + 2 tablespoons water (or 4-6 tablespoons melted butter)

kosher salt for sprinkling on the pretzels

Preheat oven to 450 degrees Fahrenheit.  Line a half sheet pan with foil and spray it with nonstick cooking spray.

Pour milk into the bowl of the stand mixer.  Add milk and honey.  Stir.  Allow yeast to much on the honey for 5-10 minutes or until foamy.  This is something good for your almost-four year old to monitor and give you status updates while you set the rest up.

Fill a Dutch oven or small stockpot with water and bring to a boil over medium high heat.  At this point either beat the egg and water together with a fork or melt the butter in the microwave.  Set either aside for now.

Add flour and salt to mixer.  Nudge it to the stir setting and allow the dough hook to work its magic until all of the flour is incorporated.  After that, kick the mixer into speed at 4 and allow the dough hook to do the kneading for you for three minutes.  At this point check to see if the dough is sticky (if it sticks to your fingers) or tacky.  If it is still sticky, add more flour in a tablespoon at a time until it becomes tacky.

Remove the dough from the hook and the bowl and form into a ball.  Use a pizza cutter or a butter knife to divide the dough into four equal wedges.  Roll each wedge into an 18-22-inch “snake” or rope of dough.  Cut this into four equal pieces.  Reshape the ends slightly and divide each of those pieces into four pieces.  You should have, after dividing all of the dough, 64 pieces.

Add the baking soda to the now boiling water.  It will bubble explosively for a few seconds.  Enjoy the drama at this point. Place the dough bites in the water, 8 at a time, for 30 seconds each.  Evacuate with a slotted spoon to the prepared pan to cool.

After you have boiled all of them, arrange them on the foil so that they are not touching (with my trusty half-sheet pan, I just barely had enough room).  Brush egg wash (or butter) onto each one and sprinkle with kosher salt.

Bake 10 minutes until the tops are delightfully browned.  (The Slow Roasted Italian recommends 7-9 minutes, but I wanted a bit more brown on mine.)

Serve with your choice of sauce or mustard or cheese for dipping/spreading.

Muffin Approved

Date Night Log: Josh’s Long-Anticipated Medieval-like Feast and a Robin Hood Double Play

Date Night Log

Date Night Log:  Saturday, March 30, 2014

Medieval (like) Feast and Robin Hood (and Robin Hood)

This, if you will remember, was the date night that Josh requested way back in January.  The one that he requested when we first sat down to discuss an actual weekly at-home date night.

The plan was to watch a medieval movie (or two), such as Robin Hood, and feast the evening away beforehand.

After much research (some of which doubled for research for my students for world history), I decided on a menu:

Opening and closing course:  cheddar cheese slices (Cheese was provided at medieval feasts as both the first course and the last course as a digestive aid.)

Potage:  A brothy, vegetable and barley soup.  I cheated and bought a can of Campbell’s beef with vegetable soup (Do you know how difficult it is to find a straight up veg soup in a can without pasta or rice?).  It was okay.

Roasted Fowl:  I waxed poetic about them here.

Poached Pears:  Again, see here for the recipe.

Beverages:  apple juice (Muffin), beer (Josh), and a shiraz wine spritzer (me)

As an historian, I know we received definite minuses for serving with plastic spoons, serving the poached pears with ice cream, and who knows what else (the spritzer).  I did offer a finger bowl for each of us to dip our fingers in (much needed after the chicken) scented with bergamot oil (I couldn’t find my rosewater).

During dinner, we watched the Disney cartoon of Robin Hood for Muffin’s benefit.  He had a lot of difficulty understanding that a prince could be bad (Prince John) or that a sheriff could be bad as well (the Sheriff of Nottingham).  Trying to explain medieval mores and politics to a Muffin is not an easy task.

The feast seemed to go over fairly well.

After supper, we began the arduous process of attempting to watch the version of Robin Hood with Russell Crowe.  I paid Josh back in spades for this movie; let’s just say that Richard does not meet his just desserts in the movie the same way he did in real life…historically. And I might have mentioned that a few dozen times during the movie.  It didn’t help that Muffin kept interrupting the movie.  That version of Robin Hood is definitely not Muffin-friendly.  I did like the portrayal of Eleanor of Aquitaine, though.  She’s probably my hero of the medieval era.

I think Josh wants to do medieval night again.  I think we should watch The Princess Bride for it.  Or Lion in Winter.  I think Josh would prefer Lion in Winter to The Princess Bride.

How did date night go for you this week?

Datus Nightus Interruptus: Muffin’s Spaceship!

Earlier this evening when Josh and I sat down to enjoy the Mama and Dada part of date night, Muffin didn’t seem to appreciate that concept.  He kept wanting to interrupt, playing games on the tablet with his own onomatopoeia sound effects, wanting popcorn, wanting a drink, having to go potty…you get the idea.

And then…he came to ask if he could build a spaceship.  He’s been watching Star Wars lately and playing the LEGO Star Wars (free) game on his iPOD.  When we told him he could, but that he had to build it in his room, he quickly came back out to show us what he had built.

At the time, it would have been after 10 P.M. Ontario time, but he wanted us to call Grandma (Josh’s mom) immediately so that she could see it.  He also wanted me to come and snuggle, something that has become a nightly ritual this week.

I decided right then and there that 1) I would photograph his spaceship during “snuggle time” for posterity (really–it’s the biggest one that he’s built to date) and 2) I would take the picture and post it on here so that grandma, his aunts, and anyone else reading the blog could see it.

So, here goes:

The Recipes for Date Night (Roasted Fowl and Poached Pears): The Spring Cleaning New Recipe Challenge

New Recipe Challenge

I am going to do another date night post, but I figured I would include the recipes that I cooked as part of a separate challenge post.  Both recipes I had my doubts about, but turned out superstar! fabulous (think the Molly Shannon skit and movie–I feel like doing that superstar! move after eating both).

I will explain the rationale behind each tomorrow in my date night post, but here is the lusciousness (as it seems date night is in two parts):


Roasted Fowl

Adapted from Wired.com’s Geek Mom

6 chicken legs (but this recipe would rock the clock of any chicken parts–yes!  it’s that good)

olive oil

fresh rosemary leaves/needles, minced

basil, dried

oregano, dried

kosher salt

freshly ground black pepper

(I am not listing amounts for the seasonings because I put a random–nearly equal–amount of each in a bowl and sprinkled and rubbed my heart out)

Preheat the oven to 350 degrees.

Give the chicken legs a shower in the sink and path them dry with paper towels.  You want them as dry as possible at this point.  Think kale leaf dry.  On second thought, forget the kale chip disaster all together.

Rub the chicken legs with a light coating of olive oil and sprinkle with the seasoning mixture (I did roughly a teaspoon of each).  You want them to be really seasoned.

Line your half-sheet pan with foil.  Spray it with non-stick cooking spray.  For an aromatic touch of whimsy, I placed a spring of rosemary in the center of the pan.  Place the drumsticks in the pan.  Bake for 45-55 minutes (or longer), turning halfway through so that more sides become golden brown and delicious.  The chicken is done logistically when the juices run clear.  Remember that dark meat is cheaper and more forgiving heat-wise than chicken breasts that tend to dry out fairly quickly.

Serve warm or cold.

Verdict:  This chicken was loved by all.  I would love to try it with thighs (my favorite selection of chicken) next time.  Date night spoiler:  this tasted VASTLY BETTER than the chicken I had that time at Medieval Times (although Josh insists we need to take Muffin).


Zert!

Red Wine Poached Pears

Adapted from:  About.com

5 peeled, cored, and sliced pears (I used Anjou), fairly ripe (but not necessarily to the point of eating out of hand)

1 1/2 cups red wine (I used an Australian Shiraz that I purchased on clearance at Albertson’s for $2.99–a $10 wine!  Yay!)

3/4 cup granulated sugar

zest of one lemon (small)

2 tablespoons lemon juice (I used two small Sunkist lemons)

2 teaspoons vanilla (although I wonder what a vanilla bean would have done to this)

2 teaspoons cinnamon, ground

Combine all ingredients, except pears, and bring to a boil.  Once the wine mixture is boiling, turn heat down to a simmer and add the pears (two pears at a time).  Simmer until they turn a shade of red that makes you happy (10-12 minutes before turning them and cooking for an additional 8010 minutes).  Remove pears and let them cool.  Boil the wine sauce until the liquid is reduced by half.  Avoid the overwhelming dictate by your taste buds to down the entire contents of the wine sauce.  Take a taste (to make sure it’s yummy).  Take another taste.  Ignore the voices telling you to down it all.  Pour sauce over pears and serve over ice cream.  Make sure that you spoon extra sauce on the ice cream and pears because that’s the best part.

Verdict:  I want to bathe in the sauce.  Seriously.  Or make sorbet from it.  Its siren’s song is calling me now.  Josh liked it over ice cream, but he felt that the taste of the poaching liquid was too strong by itself.  Whereas I could guzzle the sauce all down.  It might be good as a soda.  Or as a topping for the Frenchy Toasty Bread Pudding in a Mug.  Or by itself.  Really it’s worthy of anything.  I think it could do wonderful things to ham, in fact.  Did I mention that I ❤ the sauce?  It makes me happy.


So, date night spawned two great, repeatable dishes (even in different contexts).  I consider that a success!

The Spring Cleaning New Recipe Challenge: Breakfast

New Recipe Challenge

I have a confession to make.  Make that two confessions.

Confession #1:  There may not be any more of the Homemade Hamburger Buns left in the house.  Oopsie!  But don’t be sad; they met their just desserts.  (Haha!  Just desserts!)

Confession #2:  I think I just put the best thing ever in my mouth for breakfast.

Are you ready for it?

I don’t think you are.

If your sure…

Okay.  Here goes!

Mounds 2-Minute Frenchy Toasty Bread Pudding in a Cup!

The hamburger buns really did get their just desserts!  Josh, who pooh-poohed this recipe last night when I was gushing on the blog, now has his add-ons he wants to try (after being all “I just want maple syrup and cinnamon and powdered sugar on it.”) and even grudgingly agreed to a sprinkling of chocolate chips before it went into the microwave..

I love this method because you can literally dress it up or down as much as you wish.  If you leave out the vanilla and sub in black pepper for the cinnamon, the savory options are endless!

And just to gush again:  this recipe is done in the microwave.  Meaning your kitchen does not get heated in the summer.  Just sayin’.  Sometimes air conditioners can’t keep up with Louisiana summers (especially if the oven is on).

Here’s what I did for 2 1/2 servings (the half was Muffin’s).  I changed it up a bit from Pretty Prudent/Prudent Baby.


2-Minute Frenchy Toast Bread Pudding in a Cup

Adapted from Pretty Prudent/Prudent Baby

Around 5-6 cups torn bread of your choice (I used the remaining Homemade Hamburger Buns)

3 eggs, beaten

1/2 cup plus one tablespoon dairy (milk, half-n-half, cream, coffee creamer)–We used 2% because that’s what we have.

cinnamon to taste

1/4-1/2 teaspoon pure vanilla extract or the caviar of one-half of a vanilla bean (if you are feeling particularly decadent)

Any extra sauces, syrups, mix-ins, add-ins, or toppings

powder sugar to dust the tops with

Melted butter to grease your cup (I forgot this for Muffin’s and Josh’s and did for mine.  The beeping microwave reminded me that there was butter in there for the second day in a row.  They didn’t stick at all, but I imagine that mine tasted the best because it was buttery.)

In a bowl, tear the bread.  (I want to try croissants next time with dark chocolate chips and chunks to mimic my favorite breakfast bread item at Central Market, chocolate filled croissants)  I tore mine into fairly small chunks.  Mix the eggs, dairy, cinnamon, and vanilla (I will update when I try a savory one) in a separate container.  Pour the liquid ingredients over the bread.  I mixed it with my hands to best judge how the bread absorbed the liquid.

If you are adding nuts, dried fruit, or chocolate (any add-ins that need to be added to the whole batch before cooking), mix these in by hand as well.

Transfer the mixture to the cup(s) of your choice. I layered mine a bit putting a couple of tablespoons of bread, pressing them down a bit, drizzling maple syrup, sprinkling with sweetened shredded coconut, and sprinkling with chocolate chips before layering on another half a cup and drizzling with maple syrup.  I filled the cup the rest of the way with bread, tamped it down, and drizzled on more syrup.  I layered Muffin’s with maple syrup.  I layered Josh’s with maple syrup and sprinkled on a few chocolate chips before microwaving.  For Muffin’s half cup, I microwaved the mixture for a minute (and the egg was done).  Josh’s, loosely packed in the container, took one-and-a-half minutes.  My packed cup took two minutes.  For service, I dusted powdered sugar on the tops of each, sprinkled Muffin’s with chocolate chips, and sprinkled mine with chocolate chips and coconut.

We ate this with sausage patties (not homemade and again I found the processed patties that I had previously gobbled down lustily to be salty, gristly, and tasteless) and strawberries (WalMart had 2 pounds of strawberries for under $4).

Want a bite?

Too bad!  You’re going to have to go make your own.

I also want to try my sister’s recipe for bread pudding, scaled down (and minus the raisins) but with the lovely sauce.


This just in:  We have pears growing on the trees!  Both trees!  Just last week one of our trees had beautiful blooms like this:

And now the blooms are going away with little burgeoning pear-letts behind them!  Yay!  Hopefully we will have more than three pears this year (that Muffin eats all of).

Cent-Saving Saturday: The Coupon Paradox

Cent Saving Saturday

Hello.  My name is Muffin’s Mama, and I coupon.  Sort of.  I’m a lapsed couponer.  I used to coupon.  I sometimes coupon.  Once upon a time I couponed.

I still clip coupons.  Sometimes.  For things that I know I will purchase.  Sometimes.

But, I have to admit, the show Extreme Couponing and several bad couponing experiences certainly put a damper on my enjoyment and determination for couponing.

The first season of the show coincided with my most active checking of savings’ blogs:  Krazy Coupon Lady, (at the time) Coupon Katarina, Money Saving Mom, Hip2Save, and Couponing to Disney.  I had a schedule that I followed daily in checking them.  Religiously.  And strove to achieve those same deals or better that were mentioned on the blogs.

And then the fraud stories began to surface about the show.  Big surprise, I thought with the cynical back of my mind…a reality show that isn’t real.  But part of me was hurt.  These were couponers.  They were supposed to be honest.  Because the coupon king in my life growing up was my dad.  And he would never have done anything dishonest with couponing, or shopping in general.  So, I equated all couponers with him.

I learned quickly that not everyone has that measure of integrity.  Or relearned, rather.

That was when things began to “go South” for couponers.  Store employees began to look at us in judgment and accusation, scrutinizing each purchase we made.  Stores limited printed coupons; some outlawed them entirely.  One by one, stores stopped accepting double and triple coupons.  People behind me in line would huff and puff if they saw I had coupons.  Checkers would make thinly veiled or outright rude comments about how much they hated ringing up customers who had coupons (this happened at the “good” Kroger in my area).

The latent unpopular kid struggling for acceptance just couldn’t take the scorn anymore.

My couponing dribbled to a stop.  It hurt my heart to see the dotted lines with brightly colored images.

I didn’t stop shopping deals, but I stopped couponing.

I also stopped buying company’s products that seemed to have it “in” for couponers.  I don’t think I’ve actually purchased a product from the “Super Company” that sold household and hygiene products who seemed to just be so mean to couponers since.  You don’t need my consumer power; I do not need to bestow it to you.

Slowly, I have dusted off the scraps of my pride and rebuilt.  I have attempted to use a coupon or two, usually at restaurants, and become encouraged slowly again to use more coupons.

But, at the places where I faced the most resistance, I have not used a coupon since the battering, the rudeness happened:  Target, Kroger, and WalMart.

I was actually told by a checker that I could not use a coupon (a manufacturer’s coupon) on a sale item.  At a Target.  That employee still works at my local Target, but I refuse to go through her line.  I simply cannot bring myself to do it.  I haven’t seen the coupon-hating Kroger employees since that incident.

But y’all are here to find out what’s up with the specials this week…

I’m honestly not planning on buying much this week.  As you will see on Monday, the meal plan for this week is more in line with what we are used to, and, other than produce and eggs, there really isn’t too much we need.  And, other than some nifty produce sales, I’m not too impressed with the offerings this week.

Kroger

Personal Watermelons 1.88

Lettuce 99 cents

Brookshires

1015 onions 79 cents/pound

I also need to buy eggs, bananas, more fruit, and tomatoes (also baking mix unless I attempt to make some).

I hope you find more deals than I did!

A Few More Breakfast Buffet Bar Ideas All Wrapped Up into One (A Possible Spring Cleaning New Recipe Challenge)


New Recipe Challenge

French Toast in a Cup Bar (this could also work as an Oatmeal Bar or Baked Oatmeal Bar); Josh noted that there should be savory components (fried egg, etc).  I told him that if I added the savory components, I would be typing until I’m 80–the meats and cheeses alone would keep me busy.

After perusing Pretty Prudent a few days ago, I found something that I hope is life changing: “French Toast in a Mug in 2 Minutes.”

As I was reading through the recipe, I saw several ways that the French toast could become a hybridized French toast bread pudding in a mug. And then I heard someone mention adding other chunky ingredients (dried fruit, chocolate, nuts)…and my brain kicked into high gear…and I thought “French Toast in a Cup Bar” with each person adding their own ingredients, their own creation. My brain is moving in so many directions that I can appreciate the “use up bits and pieces” idea.

I should note that I am planning this for tomorrow. I should also note that I’m the only one who is very excited about it. But I’m sure it will end up being “Muffin Approved.” After breakfast, I will post the results and verdict.

However…I am not planning all of the toppings listed below. Just a chosen few (but you will have to see exactly which ones tomorrow). I’m sure it will resemble the ice cream bars we’ve had.  Some of the selections listed below are sauces to drizzle on after cooking; some are mix-ins and add-ins; and some you have to mix in after cooking.

Maple Syrup (naturally)

powder sugar dust

cocoa powder/hot chocolate powder

coffee powder

vanilla extract

caramel syrup

chocolate syrup

rum sauce (drool)

jams/preserves/blackberry syrup/raspberry syrup

cream cheese chunks (for a “stuffed” French toast cup)

crushed oreo or graham cracker crumbs

pecans, toasted

almonds

walnuts

peanuts

cashews

Praline topping

strawberries

blueberries

blackberries

pretzels to go with caramel (sauce or bits)

bananas (maybe bruleed bananas if I want to be really fancy)

coconut

dried apricots

raisins

craisins

dried cherries

dried blueberries

dried banana chips

dried pineapple (maybe a pina colada French toast cup)

orange zest/lemon zest if it’s blueberry

toasted almond slivers

honey roasted peanuts

whipped cream

liqueur-laced whipped cream

orange marmalade

bacon crumbles

honey

(slightly crushed) breakfast cereal

Nutella

chopped toasted hazelnuts

sprinkles 😉

ice cream

milk chocolate chips with cayenne pepper

white chocolate chips

peanut butter chips

cinnamon chips

dark chocolate chips

semisweet chocolate chips

peanut butter

apples/applesauce/apple chips

pears/dried pears

pudding

chopped up candy bars (I think Twix has promise)

cinnamon roll topping glaze (maybe Pioneer Woman’s recipe)

peaches/peach preserves

currants

mandarin oranges

candied cherries

citron

“chocolate stuffed croissant” French toast: torn up croissant with dark chocolate

bananas Foster French toast

whisky sauce

“rum” sauce for bread pudding 

bourbon sauce

chocolate bread pudding (need to figure out the conversion to mug sized)

toffee bits

vanilla bean caviar or paste

dried fruit soaked in alcohol/liqueur (Frangelico soaked raisins)

dates

butterscotch chips

exemplar to cut down to mug size

butterscotch sauce

candied ginger

marshmallows/marshmallow creme

What do you think would be a great topping/add-in in a French toast or oatmeal bar?


The Spring Cleaning New Recipe Challenge Day 7: One Whole Week and Possibly the Best Recipe Tried So Far

New Recipe Challenge

My son is a carnivore.  He’s also a fruititarian.  He can eat a pound of strawberries in one sitting and move onto several other varieties of fruit.  In.  One.  Sitting.  He also likes his carbs.

No.  You don’t get it.  He LOVES carbs.  Gluten free, we are not.  I’m fairly sure that gluten threads make up some of his tendons (and mine).

Today’s recipe offering was a last-minute find.  I made Homemade Hamburger Buns from Life in the Lofthouse (Life as a Lofthouse) that I discovered while cruising blogs for recipes.  I found enough for several dozen recipe challenges.  I started EARLY this morning (like right as Josh was leaving), putting ingredients in the Kitchen Aid.  If anything, this recipe proves that three things are indispensable in the kitchen:  a Kitchen Aid stand mixer (which has gotten a hefty workout this week–and will continue to through the weekend), half sheet pans with lips (thank you, Pioneer Woman for steering all of us to the necessity of these), and parchment paper.  I ❤ parchment paper.  Sometimes I want to wrap up in it and sleep in it…um…did I just admit that?  Seriously.  My love of parchment paper knows no bounds.  It saves my tush when making truffles in the fall/winter.

I would like to say that you could also spray the pan with Pam and be okay (and that you can use a cookie sheet).  You could also mix up the dough by hand and place it in a ziptop bag and allow you or your young’uns to take their frustrations out on the bag-o-dough.  For seven minutes.

When Muffin saw the buns are perfectly risen and brushed with butter (and so delightfully puffy), he started to snatch one off of the pan, and which point, I screamed in my wicked witch voice, “Don’t!!!  You’ll deflate the buns!!!”  Seriously.  It was causing full panic.  I had visions of hockey pucks instead of puffs of yeasty goodness (that’s happened a few times when I’ve made rolls…it’s very sad–deflation from being pressed by a human hand–usually mine, by accident).

So, Muffin waited impatiently for the 18 minutes to bake (the oven wasn’t entirely up to temp when I made it, so I went for the full 18 minutes), then for me to brush them with butter, then for them to cool to the point that slicing one open wouldn’t burn my fingers.  He ate half of one while it was still warm!

Then, while I was munching on the second half, he came back and asked for more.  So, after eating less than half of my half, I had to relinquish my bun to Muffin.  Which he devoured.  Seriously.  Like birds of prey devouring carrion.  It wasn’t a pretty sight.  Then, he wanted another “tasty bread,” as he called it.  To say this recipe was Muffin Approved is kind of an understatement.  (I must add that it is perhaps my favorite recipe that we’ve tried so far, and Josh, who came home for lunch, liked it, too.

Lunch was the leftover halved Monterey Chicken breasts made into a sandwich with the “tasty buns.”  These buns were this chicken’s correct destination of serving.  I liked the chicken when we had it; don’t get me wrong.  But if I had eaten on one of these buns first and then eaten it as a chicken breast by itself, I wouldn’t have liked it, if that makes any sense.  Of course, it photo bombs very humbly (in fact, it doesn’t prefer the limelight), but it’s beautiful on the inside.  And tastes absolutely fantastic amazing.  If I had purchased store brand buns, this sandwich would have been a disappointment.  Trust me on this:  if you make the Monterey Chicken into a sandwich, you need to make these buns.  Don’t let this sandwich be a disappointment, please.

I’m going to include my process below, but for the truly beautiful photographs of the buns, please visit the original recipe posting.

Homemade Hamburger Buns

Source:  Life in the Lofthouse

(I really like that you can dump it all in the mixer and just let it go, like the Artisan Bread).

1 egg (The original calls for it to be beaten, but I just cracked it in)

3 1/2 cups flour (all-purpose)

1/4 cup granulated (white) sugar

1 1/2 teaspoons salt

1 tablespoon yeast (I used some from the Sam’s package–You save a lot of money if you buy yeast in bulk from Sam’s, if you do much baking at all)

1 cup warm tap water (about 110 degrees Fahrenheit…when it feels like warmer than your body temperature bathwater, but it doesn’t scald your hand)

2 tablespoons softened unsalted butter (10 seconds in the microwave if you didn’t have it set out) + 3 tablespoons melted unsalted butter

Use your Kitchen Aid with your dough hook (or your upper body muscles) to combine the egg, flour, sugar, salt, yeast, and water.   Be reminded that you forgot the butter when the microwave keeps beeping (yes, this happened at 7:30 this morning while I was starting to watch the mixer knead the dough).  Dump the butter in while muttering expletives (“bumpers”).  I used the stir setting until it all came together and then kneaded on setting “4.”  If you are going to take the muscle power route, once all is incorporated, place your dough in a zip top bag and start beating it (kneading it) for the next 7 minutes.  You may need to take the dough out of the bag and fold it over a few times in the process.  The purpose is to have the surface soft, smooth, and elastic.

Butter or grease a large bowl (ceramic, if you have one), roll the dough around in the bowl, coating the surface, and let it rest (ball-like) in the bowl.  Cover the bowl with a tea towel.  If it is a cool day, turn on your oven for 1 minute to make the oven a good “rising” spot.  If it is warm in your kitchen, simply let the dough hang out.  Regardless, you need to let the dough rise until doubled in size.  In my warmed oven, it took one hour.  The original recipe posting said 1 1/2 hours.

Line your pan with parchment paper or spray it with Pam or grease with shortening.  Divide the dough into 8 equal pieces (the original poster recommends using a kitchen scale to weigh out 3.25 ounces of dough each, but my scale was MIA).  I used my best judgment and my rolly pizza cutter (the Zyliss-style one that Alton Brown used on Good Eats) to divide them in a “rustic” manner.  Make a smooth ball out of each piece by forming a loose gluten cloak (a la Artisan Bread) and smoothing the bottom.  Arrange each ball on the prepared pan with even (and hopefully generous) spacing between.  Flatten the balls gently with your hand so that they become hockey-puck shaped (at this point a bit of deflation is okay).

Warm them with the tea towel blanket and stash them again in the warmed oven.  Let them rise until they are puffy buns (around 40 minutes).  Mine were touching at this point, but the original pictures on Holly Lofthouse’s blog weren’t.

When the timer beeps, preheat the oven to 375 degrees Fahrenheit.  Brush the rolls with half of the melted butter.  Panic when they deflate a little.  More expletives.  Bake 18 minutes, checking to make sure that the tops don’t get too brown.  I like mine more on the light mahogany end, rather than golden.  Remove from the oven (inhale the yeasty goodness with a touch of sweet…contemplate a way to bottle the scent) and lavishly slather with the remaining butter…each little bun.  Make sure you show some butter love to the nooks and crannies.

The original recipe says to cool completely before serving.  That might work of you were carbphobic and gave birth to a carbphobic child.  Simply:  try not to burn your fingers too bad as you split this and eat part of your half while your ungrateful child gobbles his half and then demands the rest of yours.

Contemplate hoarding the rest or eating all of the buns immediately.

Serve with burgers or sandwich fixins.

I added to my cholesterol count today further at lunchtime when I slathered butter on the insides, placed the buns insides-down in a hot skillet, and griddle cooked them until slightly charred.  I spread the bottoms with mayo, topped with the warmed Monterey Chicken leftovers (added pickle slices to Josh’s and Muffin’s–I had my slices on the side), and topped with the other half of the bun.  Serve with “yellow” chips (original flavored potato chips).

It should be noted that Muffin ate his bun in its entirety at lunch and then begged for more tasty buns (and ate another half) immediately after lunch.

All of the ingredients (minus the butter…grrr) in the mixer bowl.

The sandwiches…being coy.

Did I mention that this recipe was Muffin Approved?

Muffin Approved