Minecraft Lava Punch

IMG_0271

Recently, in perusing my feed in Pinterest, I came across a pin for Minecraft Lava Punch from Southern Revivals.  The description on the pin said that it was made from orange sherbet and red Hawaiian Punch.  I saved it to my Delish Drinks board.  I thought that would be a pretty cool treat for Rene for when he has friends over (later this week…cough cough).  Then, yesterday, I clicked on the link and found out that it was made with orange sherbet/vanilla swirl ice cream and strawberry soda.  I fumed a bit because I figured that the description on the pin sounded pretty cool.

So, I asked Josh to get some orange sherbet and Hawaiian Punch on the way home from work.  He called me from Target to tell me that they did not have JUST orange sherbet; they only had rainbow (orange, yellow, and green for orange, lemon, and lime) sherbet.  Then, the other Minecraft-obsessed person in the household asked me what was up with the ingredients.  When I told him, he said that he thought that the yellow sherbet would go great in it because there is yellow in the lava in the game.

So, that is how I ended up with rainbow sherbet and Hawaiian Punch.

I figured to make it random and “swirly,” I shouldn’t do scoops, but should instead use a fork to rake out bits of the sherbet.  I filled the glass halfway with the sherbet, alternately layering the orange with the lemon.  Then, I topped the drink with Hawaiian Punch.  And tasted it.  Um.  It was very…very…sweet.  And it needed carbonation.  In other words, it was not something I could drink.

Batch 2 was much better.  I made it by adding a bit of seltzer to the sherbet before topping the glass with Hawaiian Punch.

Notice I said to the glass.  Most of the pins for Lava Punch (and there are several different versions of it) place the lava punch in a punch bowl or punch “urn” for mass consumption.  I think this version is best done on a glass-by-glass basis.  If you are thinking about this for a large party, you could set up a drink station in which people make their own.  I would recommend clear drink ware, however, to allow for viewing of the “lava.”

Minecraft Lava Punch

Adapted from a Pin Description for a Pin from Southern Revivals

Makes 1 (Multiply amounts as needed)

One clear glass or plastic cup

One container rainbow sherbet or one container each orange and lemon sherbet (You will not use all for one drink)

Hawaiian Punch (If you are only making one serving, you will not need the entire gallon.  However, if you are serving more, or if your household drinks Hawaiian Punch, buy the gallon rather than the singles.)

Seltzer water (Either use a SodaStream, cans of seltzer, small bottles of seltzer, or a 2 L of seltzer.  I only had cans of Schweppe’s at the moment, so I made it with a can of seltzer.  You will not use the whole can.  For a 6-8 ounce portion, you will use only an ounce or two.)

Garnishes as needed:  I’m planning on adding red Nerds or red Pop Rocks to the mix.  If I add Nerds, I will add them in the mix.  If I add Pop Rocks, I will rim the glass with a bit of corn syrup, dip the rim in the Pop Rocks, and then fill the glass.  You could also use other small red, orange, or yellow candies (as well as sprinkles or jimmies).

Rim the glass with corn syrup and Pop Rocks/other candy/sprinkles if desired.

Using a fork, rake bits of sherbet into a glass, alternating the orange and the lemon sherbet.  You should have sherbet at least halfway up the glass.  The sherbet should NOT be packed down.  The “less packed” the sherbet is, the higher up the glass you will need to go.  If you are adding candy garnishes into the mix, sprinkle them on top of the sherbet.  Splash seltzer on top of the sherbet…no more than an ounce or two.  It is only there to lighten the drink and cut some of the sweetness.  Top to the rim with Hawaiian Punch.  Add additional sprinkles or garnishes as desired.

Serve, like any good float (since, essentially, that’s what this is), with a straw and a spoon.  Enjoy!  Repeat as needed.

Note:  For the alky-minded (and for those adults who play Minecraft and enjoy adult beverages), a bit of flavored vodka, rum, or liqueur may be added over the sherbet before any other ingredients.  Some flavor possibilities include:  pineapple, orange, lemon, berry, citrus, raspberry, tropical punch, cherry, peach, pomegranate, red berry, rainbow sherbet (quoting from the Pinnacle Vodka website…I have not seen this one before nor have I tasted it), orange whipped cream (ditto), Burnett’s fruit punch (I really like what I’m seeing on the website because it looks red and therefore will not turn the mixture pale), and orange cream.  I am not advocating this, mind you, but sometimes the Creepers are coming after you…and the spiders…and you just might want to indulge a bit (possibly with pineapple vodka).

I will be making one shortly (sans any alky) for Muffin.  I have a feeling I could put anything red, orange, and yellow in a glass, call it Minecraft Lava Punch, and it would be Muffin Approved.  I am going to jump the gun (since he was bouncing on the bed, begging me to make this) that it will be Muffin Approved.

Muffin Approved

Have you ever made any of the Minecraft treats mentioned on Pinterest?

Cent Saving Saturday: Making Homemade Cordials

Cent Saving Saturday

Now let me say from the very beginning that this is not Muffin Approved.  I am not the type of parent (Is any parent really the type of parent?) to advocate feeding my child homemade cordials, or any alcoholic beverages, for that matter.

But, if you cook with alcohol (baking, flambees, etc.) it is much cheaper to make liqueurs and cordials than to purchase them.  Also, they make great gifts for alky-minded friends.

The Pinteresting Blogosphere abounds with homemade cordial and liqueur recipes.  There are numerous tomes on them, as well.  I’ve had some success with the now out-of-print Classic Liqueurs by Cheryl Long and Heather Kibbey.  I’ve actually seen copies at garage sales and book sales throughout the years.  And our public library has it, as well.

Today’s recipe has been brewing in the back of my mind for some time.  I made it fairly sweet; I’ve only tasted the original in mixed drinks in the past, so I have no idea how sweet it is.  It’s one of the liqueurs that I consider to be “cost prohibitive,” like the Grand Marniers of the world.  I’m talking about St. Germain, or elderflower liqueur.  Mine came out a bit paler, but it may be because of what I started as a base.

Back when I was using my SodaStream with annoying frequency and so NOT in love with the sodamixes (except for the “naturals” which are more expensive per serving), I had purchased a bottle of elderflower juice concentrate from IKEA in Frisco, TX (outside of Frisco) which is very VERY tart when diluted to the suggested 1:6 with soda water.  Think just barely sweetened lemonade.  But with a lovely floral quality; don’t get me wrong.

The concentrate has sat, half used, in the door of my fridge mocking me.  Because, in the back of my mind, I knew what I wanted to do with it.  I wanted to try my hand at liqueur making again, with elderflower cordial.

With no recipe to go by.

Josh knows that usually means trouble.  Usually when I come up with a recipe for something, I pull the “Tyler’s Ultimate” approach of Tyler Florence fame.  I look at many available recipes, take the best parts, and mash them all up into one.

I couldn’t quite do that here.

And, usually, this means roughly a 60% failure rate.

Therefore, for months, the elderflower concentrate continued to mock me, every time I opened the fridge.  I comforted myself with the knowledge that I didn’t have enough vodka to make it anyway.  But, I owed my mom her major Christmas present (homemade Limoncello…which I will make…once I have enough lemons…I promise, Mom!), so I purchased the big “liter and a fifth” bottle at Albertson’s of vodka.  Their brand.  With the exception of homemade Grand Marnier, you want to use cheap hooch in liqueurs.  Some people recommend using diluted grain alcohol in cordial making; I don’t have the patience (or the chemistry degree) to figure that out.

(Both are probably reasons for my 60% failure rate)

The goal was to provide a liqueur of enough body to be roughly equal to others of that type.  The kind that when sloshed in a glass leaves resinous residue.  That meant making a syrup with the elderflower concentrate.  I figured on simple syrup proportions:  equal amounts concentrate to white granulated sugar.

I guesstimated (have I mentioned that this is my one and only attempt so far?) on half cup increments of each, half a cup of elderflower concentrate and half a cup of sugar.  Then, I decided to just say to heck with it and add roughly a quarter cup of water (after realizing the concentrate was already fairly resinous to begin with).

I cooked that over medium heat, stirring constantly, until the grains of sugar were no longer visible.

Then, I poured the mixture through a funnel into an empty wine bottle (something to collect if you plan on cordial making…especially screw top wine bottles).  I then filled the bottle halfway with vodka, capped it, shook it, and then topped it up with the vodka, capped it, and shook it, trying to disperse the syrup.

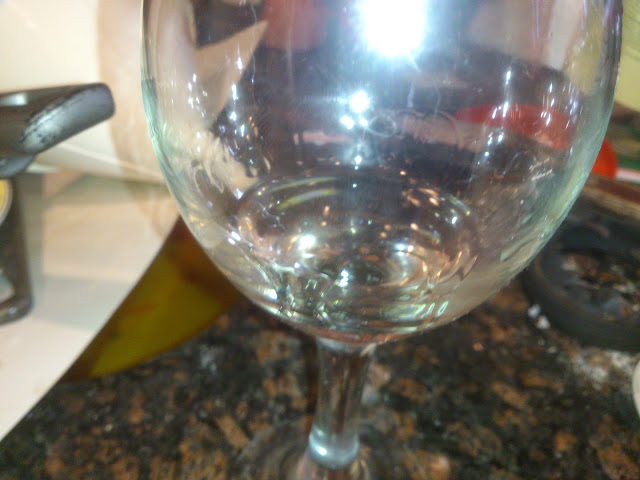
To test the viscosity, I poured a tablespoon or so into a wineglass (that I purchased today at garage sales for 25 cents each!) and swirled it around.  To my utter delight, there was the telltale resinous residue!  Result!  I then did something you should never never do:  I taste tested it.  Most liqueurs take some time to meld and blend (coffee liqueur is notorious for this…imagine coffee-flavored mouthwash…well…minus the mint flavor), so the vodka flavor is usually very pungent.  To tell you the truth, it wasn’t that bad.  There is already (hiccup!) some evidence of the complexity to come.  If St. Germain is anything close to this, I can understand why liquor outlets feel confident charging upwards of $30 a bottle (that’s for less than a liter, by the way).

The cost breakdown of mine is (considerably) less.  I used a fourth of a bottle of elderflower concentrate (so $1.13 for that), a half cup of sugar (pennies…but lets just say ten cents to be obstinate), a quarter cup of water (I’m not figuring out the cost of filtered tap for this amount, sorry), and roughly 15 ounces of store-brand vodka that I purchased for roughly $10 for 1.75 liters (roughly $2.54 worth, give or take a penny).  Ultimately, the grand total for the homemade version was $3.77.  One of the prices quoted for St. Germain online was $33.99.  The “homemade” version would save you $30+…nearly 90%.

That’s the kind of math I like.

I’m glad it worked so well the first time out of the gate because I could now be upset about wasting $3.77 of materials, especially that last 1/4 of the elderflower concentrate that I had such great plans for…someday.  Here’s an (admittedly not very effective) shot of the tablespoon of liqueur in one of my new wine glasses!

(The important part is that you can see the resinous residue on the side of the glass!)

Cheers!

You may see the printable of the recipe here.

A Long-Overdue Update

It seems that I am cursed with “wannabe-blogger-but-seem-to-forget-my-blog-exists-for-a-few-years-itis.”  One of my summer goals is to be a more faithful blogger.

Rene is now two years old, in a new house, with a new best friend:  Daisy, a mixed-breed Beagle puppy rescued from the pound.  Daisy has a few bad habits (reality TV, being a bed potato), but she has really blended into the family well.

Josh and I are still in search of the great deal as well as mastery of the kitchen.  In the great whirlwind of the past two years, Rene has proven a gung-ho participant of our experiments in the kitchen.  There is very little (excluding raw cruciferous vegetables) that he will not at least try.  He seems to be a fruititarian (and can consume massive quantities of grapes, berries, and pineapple).

One thing that has kept me (ahem) busy is the great (Josh, if he reads this will surely be adding, waste of time) Pinterest.  I heart Pinterest.  I am addicted to Pinterest.  It has been way too long since my last pin (a few hours).  🙂

However, naysayers of Pinterest aside, the most wonderful site on the planet has inspired me immensely.  I have attempted several recipes (well, thought about attempting and have actually attempted a few).  In the next few weeks, I will post a few of those.

I do not promise to be a very proficient blogger with snazzy media sidebars, but I hope to provide entertainment, cute pictures of Rene (“Muffin”) and Daisy (when she is not in her Chicagolicious-Next-Top-Model viewing marathons), and some useful information.  I hope you stick around to enjoy the visit.  While you are waiting around for the next post brew up some Southern Sweet Tea perfected by my Canadian (northern Ontario-hailing) husband, Josh.  Like most great southern (American) recipes, it may seem a bit excessive, but it really hits the comfort food spot.

Canadian Southern Sweet Tea (a la Josh)

1 family-sized tea bag of Orange Pekoe tea (It will be soaking for a nice long while in the sauna-a.k.a. pitcher of hot water, so make sure it is a brand you feel comfortable with drinking.)

1 quart boiling hot water (see below for directions)

1 cup white sugar (although Josh is thinking we may switch over to honey when we buy some from the local beekeeper tomorrow–I will keep you posted with updates in that venture)

1 quart cool water

In a half-gallon pitcher (or a gallon if you want double the comforting love), add the sugar.  Secure the tea bag to the handle of the pitcher by using the little little gashes on the tea label to make a loop with the string.

Boil 1 quart of water in a tea kettle.  Trust me on this.  I have spilled enough boiling hot liquids from saucepans to know:  use a tea kettle.  Plus, it makes that really cool whistling sound that always gets Daisy’s attention.

Pour the boiling water into the pitcher, being sure to douse (I love that word!) the tea bag with the boiling water.  Aim for it if you have to.  The purpose is to get the tea and the bag wet enough so that an infusion happens.  A dry tea bag means you have hot sugar water.  Stir until sugar dissolves.

Let it sit for no less than 10 minutes.  (I know some people are having issues with the tea bag–and not loose tea–as well as leaving it steeping for so long.  Trust me.  It’s good.  If you have problems with it, continue on with your previous method.  You just won’t be making Josh-tea.)  Once the water in the pitcher is a dark brown (Think of it as tea concentrate!), remove the tea bag to be placed in the compost and add the remaining water.  Stir.

*Do not forget that you have tea steeping.  It tends to be a bit strong after a couple of hours, even with the water added.

If you simply are parrrrched and cannot wait a moment longer for tea-filled refreshment, load your cup full of ice (mason jar, plastic Mardi Gras cup, wine goblet, whatever strikes your fancy) and pour the tea slowly (directly on the ice) into the destination drinking vessel.  Garnish–if you must–with mint and/or lemon or other citrus or whatever you want.  Drink.  Repeat.  Make some more.  Repeat.