Family Heirloom Recipes: Chicken and Dumplins

Family Heirloom Recipes There are dishes in my family that have been created (at least) through three generations:  my great-grandmother, grandmother, mom, sister, and me (and sometimes my eldest nephew).  One of those recipes is my grandmother’s chicken and dumplins.  Yes.  Dumplins.  There is a recipe written on lined paper in my grandmother’s hand that says dumplins.  Unfortunately, she left off the recipe for the first half of the equation (as well as the all-important “juice” or soup). My late uncle Billy also had a chicken and dumplins recipe that was so close to my grandmother’s that eventually they melded.  My sister has spent the last several years perfecting the recipe.  My nephew even makes the recipe, and he’s 11. This is not a veggie broth chicken and dumplins.  This is chicken…and dumplins. And the “juice”/soup is what makes it.  At least in my opinion.  For some in our family, it’s the dumplins.  For me and a few others, it’s the juice.  I would be happy with a bowl of juice with one lone dumplin and one square inch of chicken.  I’m weird that way, I know. A few years ago, my sister invited me over to learn how to make chicken and dumplins.  I wrote down what she did, and I’m ready to share that with you now.

Chicken and Dumplins

1 whole chicken, cut up (do not think to get by with boneless, skinless chicken breasts–you need the big kahuna)

3 cups flour

1/2 cup shortening (Crisco)

1 teaspoon salt

water to make the dough

1 can evaporated milk + 2 tablespoons/pats worth of butter or an equal amount of half-and-half (My sister insists the half and half is closest to our grandmother’s recipe)

1 can cream of chicken soup

2-3 cans chicken broth, if necessary

Boil chicken.  Take out of broth to cool.  (My sister recommends cooking the chicken the night before and separating the chicken from the broth.)  Add broth if necessary to “boiled chicken water.”

In a big bowl, place dry ingredients and shortening.  Use whisk (my sister does not use a pastry knife) to cut shortening into the flour.  Add water and work with hands until workable (as a dry biscuit dough).  Roll, a “snowball size” at a time on a floured surface until “pie crust” thickness.  Cut into dumplins (strips 1″x2 1/2″) with a butter knife.

Heat the broth to a rolling boil.  Drop dumplins in one at a time.  Boil at “high” until there is a crackling noise, then reduce to about medium-high (“7” on your stove settings, if you have it).  While boiling, scrape the bottom of the pan, adding broth to ensure that nothing “sticks.”

Cook 15 minutes.  Whisk together cream of chicken soup and evaporated milk/butter (or half-and-half) mixture.  Add this and the chicken to the pot and stir gently.  Turn off heat and tightly cover with a lid.

When ready to serve, reheat over medium until hot.

25 Days of Holiday Goodies Day 12: Cornbread Dressing

25 Days of Christmas Goodies Button

At Christmas and November Thanksgiving, we eat cornbread dressing.  We don’t add meats or nuts to it; we do add celery and onion (and mashed boiled eggs), but no high falutin’ fancy chunks.

We are unabashedly Southern in our dressing.  Cornbread has to be the base.  When I was younger, my sister and I would crumble the cornbread for my mom’s dressing.  We would have a modified food fight, a cornbread crumb fight.

Note:  I’ve been known to eat a bowl of leftover dressing for breakfast.

IMG_0566[1]

Cornbread Dressing for a Crowd

3 packages white (not sweet) cornbread mix (plus the ingredients to make all three…mine took 2 cups of milk and 3 eggs)

5 eggs, boiled, peeled, and mashed

3 ribs celery, finely chopped

1 onion (yellow or white), finely chopped

3 (14-15 ounce) cans chicken broth (or 4 if prepping to bake another day)

salt and pepper to taste

Prepare cornbread according to package directions and bake in a 9×13 inch glass pan.  Cool in pan.  Crumble cornbread into a large bowl–but reserve pan for holding the completed dressing.

Microwave onion and celery for five minutes or until soft.  Add onions, celery, and egg to cornbread crumbles.  Stir.  Pour in broth, one can at a time, stirring after each addition.  Season to taste.  Smooth mixture into a 9×13 pan.  When ready to bake, bake in a 350 degree oven for one hour.

25 Days of Holiday Goodies Day 11: White Bread Stuffing

25 Days of Christmas Goodies Button

This is the recipe that Josh’s mom gave me for stuffing.  We serve it every Canadian Thanksgiving.

This stuffing is a great way to use up the ends or “heels” (as my mom calls them) of the bread.  You can freeze them throughout the year as you use up the remainder of the loaf of bread.  I’ve started toasting the bread before cubing it; that makes for a better flavor and texture (more like croutons) in the final product.

IMG_0243

Stuffing (for turkey)

croutons or dried bread cubes – 4-5 cups or as needed, more or less

1 medium onion, chopped

2 or 3 large stems celery, chopped

3 tablespoons cut up parsley (or 1 tablespoon dried)

salt and pepper

1 or 2 eggs, slightly beaten

(1/2 cup milk)

1 cup chicken bouillon – broth (approximately)

Mix dry stuff and eggs.  Add remaining liquid until all damp but not soggy.  Put in turkey and the rest in a greased oven dish with lead.  Heat in the oven for an hour or so until heated.

And now for the printable:

Stuffing for Turkey

25 Days of Holiday Recipes Day 10: Boeterkoek

25 Days of Christmas Goodies Button

This is the other Dutch treat recipe that Josh’s mom gave to me.  Translated into butter cake, this almond-flavored buttery cake is baked in a pie pan.

Once the treat is baked, we cut it into the thinnest wedges imaginable (to allow for more servings).

Boeterkoek

1 stick butter

1 cup sugar

1 1/2 cups flour

1 egg (beat and use 1/2)

2 teaspoons almond flavoring

Cream together butter and sugar.  Mix in remaining ingredients and press in a pie plate.  Spread some egg on top (I use a pastry brush).  Bake at 375 degrees for approximately 30 minutes.  Cut into wedges.


Muffin danced into the bedroom shortly after tasting it, and said “I really like this cake, Mama.”  I guess that makes it Muffin Approved.

Muffin Approved

25 Days of Holiday Goodies Day 9: Koek

25 Days of Christmas Goodies Button

Josh is French Canadian on his dad’s side of the family and Dutch on his mother’s side.  With the meatloaf recipe and a few others that Josh’s mom equipped me with, she included a couple of Dutch holiday treats.  The first is one that is a spice loaf cake, called koek.

The recipe makes two standard loaves, or, as I prepare it, one standard loaf and six mini loaves.  That way we have one to snack on throughout the season plus smaller ones to give as gifts.

The slices are great warm with softened butter (Honey butter or sweetened orange butter works great, too!).

Koek

2 teaspoons cinnamon, ground

2 teaspoons allspice, ground

2 teaspoons ground ginger

2 teaspoons nutmeg

2 cups brown sugar

1 cup white sugar

2 teaspoons baking soda

3 cups flour

1 1/2 cup milk

2 eggs

Mix ingredients together.  Pour into two loaf pans.  I usually make one regular-sized loaf pan and one pan of mini loaves.  Bake at 350 degrees for approximately 1-1 1/4 hours until cooked.

What is your favorite loaf cake or quick bread?

Family Heirloom Recipes: Spinach Madeleine AKA Spinach Casserole

Family Heirloom Recipes

Okay.  It’s confession time.  I hate raw spinach.  I don’t like my lettuces to be sweet…unless I am adding something sweet (dressing-wise or add-on wise) to them.

That being said…I love frozen chopped spinach (once it’s heated, of course).  I absolutely adore (formerly) frozen spinach sauteed in lightly browned and golden garlic and olive oil.  I could bathe in (and devour) a tub of creamed spinach.

My love affair with cooked spinach began well before my teen years when my mom decided to make again an old family favorite from River Road Recipes (the official cookbook of the Junior League of Baton Rouge) for Thanksgiving.  Being a child, I turned up my nose at the idea of anything called “spinach casserole.”  Forget the fact it had jalapeno cheese in it.

And then I ate at least half of the offering.  (Keep in mind:  Thanksgiving and Christmas dinners have one purpose in mind:  who cares how much you eat day of…it’s the leftovers that matter.  And I’m not talking about let’s stack all of the leftovers between two slices of bread.  I’m talking about reliving the day of with a recap of the meal…leftovers-style…for as many days as possible…if possible three times a day.)  I think, if I remember right, leftovers lasted four days.  So four days of eating spinach casserole breakfast, lunch, and dinner.

Yup.  Breakfast, lunch, and dinner.

It’s that good.

In recent years, it’s become a toss-up between the kicked up green bean casserole from Vintage Vicksburg which will probably be on the table at American Thanksgiving at my sister’s and making the spinach casserole (referred to formally as Spinach Madeleine).  Both are labor intensive; and the spinach casserole is a bit pricey to make.  Worth every penny as every morsel of food will be gone from the pan (in this case, a Pyrex loaf pan), but still pricey.

It all boiled down to one very key ingredient whose discontinuance almost led to the end of Spinach Madeleine (or at least a hiatus that lasted a few years)…Kraft’s Jalapeno Cheese Roll.  You see, Kraft used to make a jalapeno cheese roll with a black wrapper and a garlic cheese roll with a green wrapper.  A while back, they discontinued both…first the jalapeno cheese log and then the garlic one.

It wasn’t until I was an adult that I noticed (after pouting for years about the demise of the jalapeno cheese roll) that Kraft began making a Mexican Velveeta (insanely pricey, like most of their Velveeta has become recently).

So, I went about attempting a substitution.  And it worked…it was doable…but, it wasn’t the same.  I keep hoping the bigwigs at Kraft will hear the collective cry of those who love the recipe and bring the cheese roll back.

In making the list for Canadian Thanksgiving, I decided I needed to add it to the list.  Have you ever noticed how starchy Thanksgiving meals tend to be:  dressing or stuffing, mashed potatoes, sweet potatoes of some kind, rolls of some kind, and possibly even other starches.  Yes, we always serve broccoli and cauliflower with cheese sauce (as well as the raw crudites…called relishes), but I wanted…well…I wanted an excuse to make spinach casserole.

But, here’s what I did this time:

20 ounces frozen spinach (I ended up with 12 ounce package bags…so I ended up with 24 ounces)–Make sure you get chopped!

4 tablespoons butter

2 tablespoons flour

1/4 cup white onion, chopped finely

1/2 cup whipping cream (I still had some left over from truffle making a bit ago.  The original recipe calls for evaporated milk)

1/2 cup “pot likker” (made from preparing the spinach–I microwaved mine sans extra water and ended up with exactly 1/2 cup–once I squeezed the spinach in a wire mesh strainer bone dry)

1/2 teaspoon black pepper, freshly ground

3/4 tablespoon garlic salt

3/4 tablespoon celery salt

a dash of cayenne or red pepper, or to taste (optional)

6 ounces Mexican Velveeta, cubed

1 teaspoon Worcestershire sauce

Cook spinach according to package directions, drain, and reserve liquid.  Pour spinach into greased final baking dish (I used a loaf pan).  I microwaved two packages’ worth for 8 minutes.  In a large saucepan, melt butter over low heat.  Add onion and cook slowly until softened.  While the onion is cooking, pour the cream/milk into the pot likker.  Add flour to the butter and onion, blending until smooth, and cook about 1 minute.

Slowly add creamy pot likker, stirring constantly.  Cook until thickened and smooth (think Alfredo sauce consistency or a bit thicker).  Add seasonings and cheese.  Stir.  Pour over drained spinach into appropriate casserole dish (I used the loaf pan).  Stir to blend completely.

*At this point you would want to refrigerate for at least one day or freeze, covered in foil.  On the cooking day, bring to room temperature before baking in a 350 degree oven for 30 minutes (or until hot and bubbly).

Note:  I have seen several post-Kraft-catastrophe recipe substitutions for the cheese roll.  Some use Velveeta or Cheez Whiz with cut up pickled jalapeno peppers.  Some use pepper jack.  I haven’t tried either.  In some places, a company is producing a jalapeno cheese roll clone, but it looks wrong to me, somehow.  Maybe one day I’ll try it, though.

I serve this as a big meal side dish.  I refuse to do what one of my mom’s coworkers once suggested when Mom brought the casserole to a work holiday potluck:  use it as a spinach dip for chips or crackers.

That still causes my stomach to curl in on itself.  Almost as the thought of the newest Pinterest pumpkin monstrosity does:  pumpkin rice.

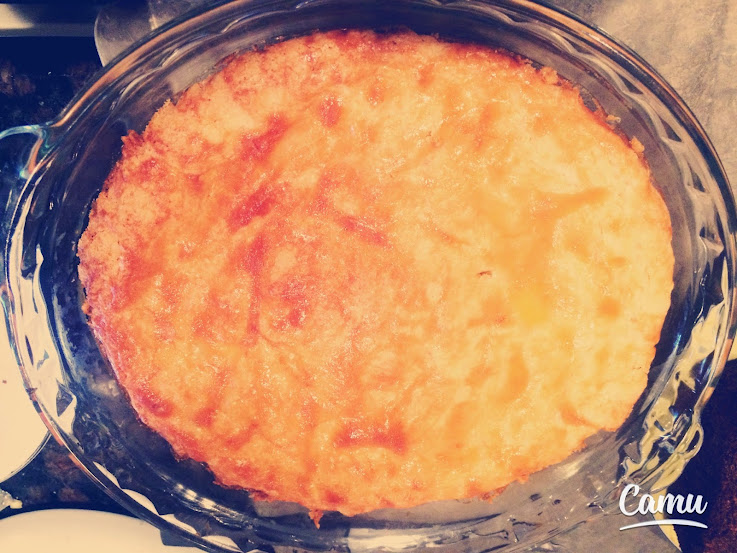
Here was the casserole (before baking):

IMG_0208

It’s all I can do not to go invade and conquer the loaf pan in the fridge right now.

Happy Canadian Thanksgiving, everyone!  🙂

Meal Plan Monday: Back to Work Full-Time

Meal Plan Monday

This week brings a return to work full time.  I am planning to make it a fairly low-key foodie week, with a three-in-one meal of chili and prep for the chili and another dish on the weekend.

I hope to compile a list in next week’s Meal Plan Monday post that will detail foods that can be prepped on the weekend and either compiled and cooked quickly on the weekday or cooked completely on the weekend and reheated on the weekday.  This list will help me and others prepare for the busy meals of the week.

But here is the best I could scratch up for the week:

Saturday:  La Madeleine’s Tomato-Basil soup and grilled cheese sandwiches

Sunday:  fried rice

Monday:  Texas Hash (prepped Sunday):  See the recipe below.

Tuesday:  chili (prepped Sunday) and cornbread

Wednesday:  Frito pies with leftover chili

Thursday:  chili cheese dogs with leftover chili with any vegetables ready from the garden

Friday:  Pizza grilled cheese with pasta sauce for dipping (may save some of the pineapple to do a Hawaiian one again)

Saturday:  grilled hot wings and fries (maybe with grilled baked beans)

Sunday:  burgers (I want to do something special with them.  Maybe I will check out some of The Slow Roasted Italian‘s recipes)

Growing up, one of my favorite dinners was my mom’s Texas Hash.  I doubt it will have ground beef this time (I may use ground pork or ground turkey).  I loved the idea of the meat and rice and tomatoey goodness and the bell pepper and onion and the most exotic spice of my early childhood…chili powder!  Chili powder was great for many things when I was young:  Texas Hash, chili, taco seasoning, and sprinkled in my mom’s and grandmother’s variations of beefy vegetable soup.  As I grew older (and we purchased a microwave), the preparation was even faster.  This is a great one-dish meal that is great with the pineapple-cheese salad.

But, here it is:

(Mom’s Texas Hash, that is)

Family Heirloom Recipes

Texas Hash
(Adapted from my mom)

1 pound ground beef (or turkey or pork), browned and crumbled

1 cup rice (before cooking), cooked according to package directions (Mom now uses brown rice, but my favorite method of preparation is white rice.)

one large bell pepper, diced

one large onion, diced (preferably white or yellow)

one 8-ounce can tomato sauce

one can (14-16 ounces) diced tomatoes (I used petite diced)

one tablespoon (or to taste) chili powder (Make sure you use chili with an “i” rather than an “e” and that you use chili powder, not chili seasoning)

Brown and crumble the ground meat.  In a large casserole dish (microwave safe if you are using the microwave, oven-safe if you are using an oven) combine meat, rice (cooked), and chili powder.  Taste and add more chili powder, if desired (but keep in mind if you are preparing this for a spice-phobe that cooking the dish will intensify the heat slightly).  Zap in the microwave (or saute in a pan sprayed with nonstick cooking spray) the onion and bell pepper until softened.  Stir this mixture into the meat and rice.  Stir in the tomato sauce and undrained can of tomatoes.  Either microwave for 6-8 minutes or bake at 350 for 30 minutes.  If you prepare ahead of time, prep it to this point and then bake in a 350 degree oven for 40-50 minutes (or until heated through).

Serve with taco sauce, extra chili powder, salsa/picante sauce, sour cream (Josh), or ketchup.  I’ve been known to drizzle it with a bit of honey when I was younger (for that sweet heat feel).  This goes well with the pineapple cheese salad and bread and butter.

As usual, I will be linking up with OrgJunkie’s Menu Plan Monday.

What is on your meal plan this week?

Family Heirloom Recipes: Pineapple and Cheese Salad

Family Heirloom Recipes

When I made the Simple Crockpot Chicken and Dumplings, I made one of the old standby sides for the dish in my mom’s family.  That was the pineapple and cheese salad.  This seems to be an acquired taste although growing up I found it to be so elegant.  You layer a few shreds (or leaves) of iceberg lettuce on a salad or dessert plate.  On top of that, you plunk one canned pineapple slice (or two, if you are feeling particularly decadent).  In the crater created by the absence of the pineapple core, you mound a teaspoon or so of mayonnaise (store-bought is fine).  On top of that, you sprinkle some cheddar cheese (the sharper, the better).

I should note that Josh does NOT like this salad.  The other day when I made it, he only wanted a pineapple slice.  I prepared Muffin a pineapple slice with cheese on top of it…and he liked it.

Shortly after my grandmother passed away (five years ago almost), I tried to find the origin of the recipe.  It didn’t appear that any cookbook published it.  Recently, I found a few versions that were close, but not exact.  You can swap out the pineapple for a canned pear half and the cheddar cheese for green-can Parmesan cheese.

Pineapple and Cheese Salad

From the Creative Minds of My Maternal Ancestors

For each salad:

2-3 leaves of iceberg lettuce (or several shreds of iceberg lettuce), arranged attractively on a dessert plate

1-2 canned pineapple slices (or canned pear halves)

1-3 teaspoons mayonnaise

1-3 tablespoons grated sharp cheddar cheese (or 1 tablespoon grated Parmesan cheese)

On the bed of lettuce, arrange the pineapple slices.  Fill the core cavity of the pineapple slice with mayonnaise.  Sprinkle with cheese.

Serve as an appetizer salad alongside other comfort family heirloom recipes.

Since Muffin ate a kid-friendly version of the salad, I consider this one Muffin Approved.

Muffin Approved

What is your favorite family heirloom recipe?