A Catch-Up Post: Oven Fried Pork Chops

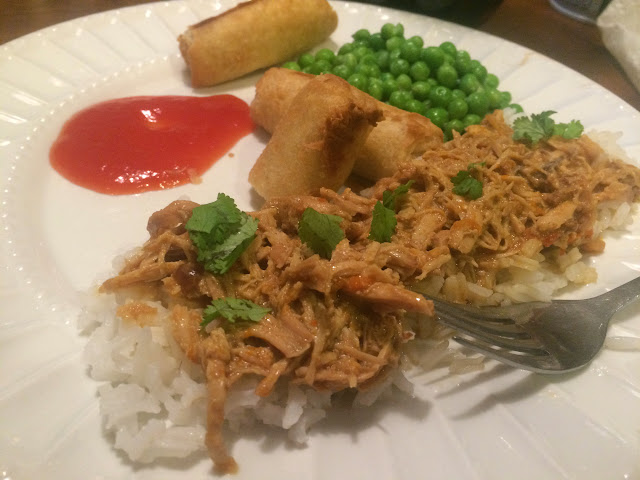
Muffin likes pork.  He loves it, in fact.  There’s just one small problem:  he calls it chicken.  Recently, we had Recipe Girl’s Root Beer Pulled Pork (again).  As I was attempting to pull it (it always takes me at least an hour to pull that much pork), he came in and asked me if he could have a bite of that chicken.

He does that a lot.

Ask for bites while I’m preparing it and calls pork chicken.

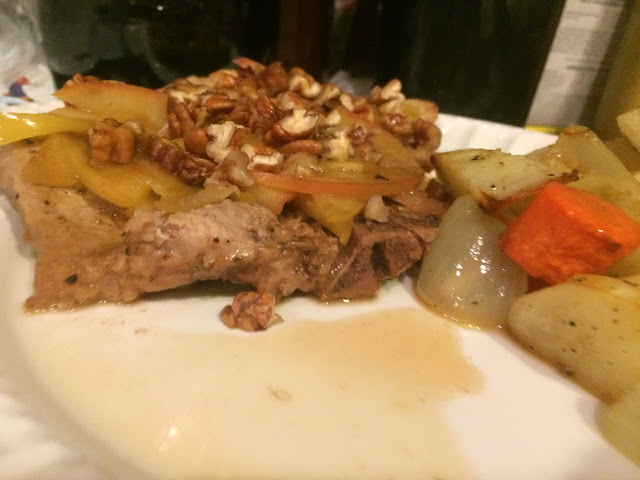
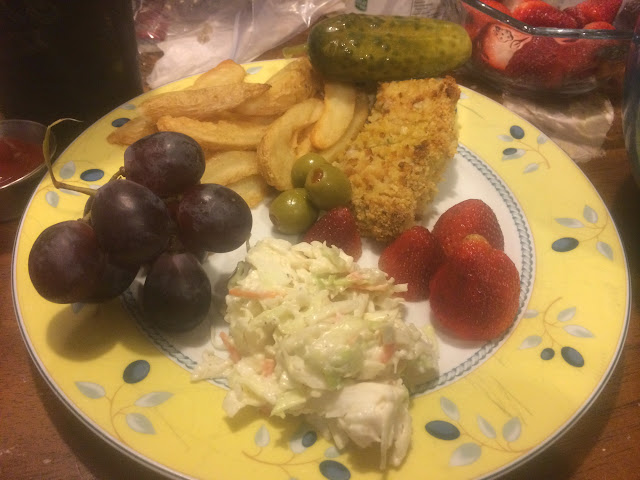
Most pork recipes that I make are Muffin Approved, and this one certainly is.  If you look at the plate above, pretty much the only thing he would save for last is the cole slaw.

I like this recipe because it is a four-ingredient recipe (five if you count the potatoes that cook alongside the pork).

It comes together really fast and goes with a variety of sides.  In fact, if you look at the above plate, you will note that the pork is actually the least percent of the plate “pie graph.”  It really doesn’t have to take center stage here.

This recipe (found in two places on the Better Homes and Gardens website) appears all over the Internet.  I think I first found the idea when thumbing through one of the BHG magazine cookbooks.  I had written it down as one to look up from the index, and, luckily, it was on the website.

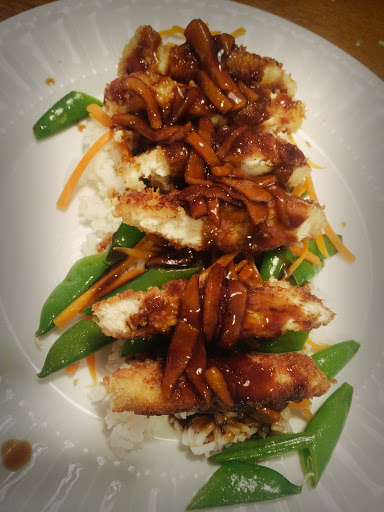
This picture comes from February, and it is one of the forgotten heroes that is only waiting for the weather to cool down below 100 (I’m writing this post mid-July) to make again.

Isn’t it weird how that happens?  You make a recipe that’s awesome and then it gets shoved aside and forgotten in the melee of day-to-day life.  In these catch-up posts, I think I’m starting to see recipes that were forgotten that need to be, not only blogged about, but also to be re-made.

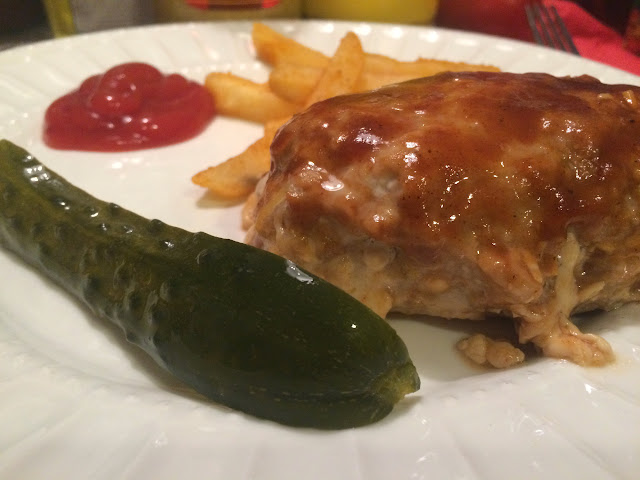
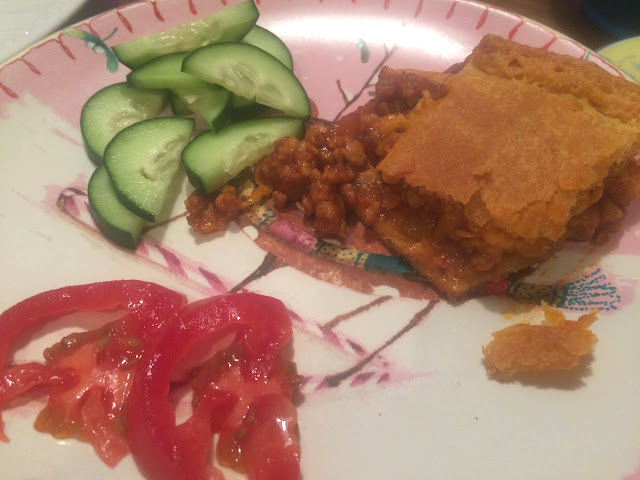
Oven Fried Chicken (and Potato Wedges)

Adapted from Better Homes and Gardens

four pork chops, trimmed of fat (I used slices from a pork loin.  The website recommends fairly thick chops, but I find those sometimes difficult to eat–especially for Muffin)

one package of cornbread stuffing mix (I used Stove Top.  I would recommend crushing up some of the larger pieces in order to dredge it easier)  You will use about 1 cup or so of crumbs.

1 egg

2 tablespoons milk

24 ounce frozen homestyle potato wedges (although I think any largish frozen potatoes would work)

Preheat oven to 425 and line a half sheet pan with foil.

In a shallow dish beat together the egg and milk with a fork.  Place the stuffing crumbs in another shallow dish.  Dip both sides of a pork chop in egg mixture than coat with stuffing crumbs.  Place on one side of the baking sheet.  Repeat with remaining chops, being sure to arrange them on the pan in a single layer.

Pour the frozen potatoes on the other side of the pan, arranging in as shallow of a layer as possible.

Bake 20-25 minutes, stirring the potatoes at about 12 minutes.  They are done when the pork measures 145 degrees in temperature and the potatoes are lightly browned and crisp.

Serve with a choice of sides and condiments.  They can be dressed up or dressed down as you see fit.

These were totally Muffin Approved!

Muffin Approved

A Catch-Up Post: Apple-Pecan Pork Chops

First, let me say, this recipe was Muffin Approved.

Muffin Approved

Are you enjoying these catch-up posts?  I’m trying to make it all about food.  I know that I sometimes get ranty on some posts and seem to have forgotten what it’s like to cook at times, but I’m appreciating catching up with you on recipes I’ve planned in MPM, made, photographed, and…never posted.

I know.

I’m trying to get better with it.

As I was saying, this recipe was Muffin Approved, but it wasn’t really Josh Approved.  My dear sweet husband really doesn’t like food mixing with his meat much.  I once suggested making poultry with orange glaze for Canadian Thanksgiving (one of our first CT’s together, in fact), and he was quick to veto it.

Adding chopped nuts as a garnish on top of the apples?  That really didn’t endear this dish to him.

I liked it, but I was wanting it to have more flavor…and a pan sauce with a bit more body.  As you can tell from the picture above, the consistency was more…runny.

Runny usually doesn’t make me think yummy for my tummy.

This recipe came from Better Homes and Gardens’s website (originally found inside a BHG magazine cookbook perusal), and just like the oven-fried pork chops, it starts with four chops (BHG wants thick cut; since I cut mine from the pork loin, I couldn’t guarantee that).

Apple-Pecan Pork Chops

Adapted from Better Homes and Gardens

4 boneless pork chops (see above), trimmed of fat and seasoned with salt and pepper

1 medium red apple, sliced (skin-on) thinly

salt and pepper (fresh-ground on the pepper, if you please)

2 tablespoons butter

1/4 cup chopped pecans

2 tablespoons packed brown sugar, plus extra for sprinkling at the end

Melt butter in a large skillet over medium heat until it becomes bubbly.  Add apple.  Cook and stir 2 minutes (try not to make apple mush).  Remove apple from skillet (you’ll thank me later).  Add pork chops.  Cook pork chops.  Turn pork chops.  Sprinkle with brown sugar.

Cover and cook 2-4 minutes more until pork reads 240 degrees on a meat thermometer.  Now, spoon the apples on top and sprinkle with pecans and additional brown sugar, if desired.

Note:  I followed the directions on the website when I made it, and the apples turned into mush.  Removing them after sauteeing them would probably help.


A Catch-Up Post: Baked Chicken Chimichangas

Several months ago (March 2015), chimichangas were on the menu.  I actually made them then, but didn’t blog about them.  Awful of me, I know.  As the school year gets ready to begin (I’m writing this in mid-July 2015), I figured that it would be best to have a post or two (or ten) ready to go in case life (and work) happens.

This is the first post I have planned for that eventuality.

Can you tell that I love Tex-Mex food?  I literally ate it breakfast, lunch, and supper throughout the last trimester of my pregnancy with Muffin.  For months after Muffin was born, Josh put his foot down…no tacos, enchiladas, etc.  (Note:  I would eat leftovers for breakfast and lunch.)

I’m always looking for recipes to expand my repertoire of Tex-Mex recipes.  As a child, some of my happiest (food) memories were when my mom would make “Mexican” (tacos…and sometimes tostadas).  I’ve discovered, as I’m sure my mom discovered then, that tacos and the like are easy entry points on getting kids to try normally-not-kid-friendly veggies.

In Muffin’s case, he will have everything on his taco except onion (and he is okay with cooked onion in the taco meat).  Literally everything.  I still have nightmares about the pretzel taco…not to mention the blueberry taco.  Shudder.

When I found this recipe on Culinary Couture, I was very excited because the chimis are baked, rather than fried.  I have nothing against frying anything, but sometimes when I fry things like pies, egg rolls, wontons, or chimis, they burst open and the filling leaks out.

Totally not Muffin Approved.

They do crisp up nicely; however, if you plan on having leftovers, expect them to be kinda more like a soft chicken burrito.

I do plan on trying different fillings (to be more various and versatile) in the future, but the method (and the filling) work perfectly.

Baked Chicken Chimichangas

Adapted from Culinary Couture

2 cups chicken, cooked and shredded (I used some cooked with taco seasoning in the slow cooker)

1 cup chunky salsa (not runny picante sauce or restaurant-style blended salsa)

1 teaspoon ground cumin

1 teaspoon oregano (The original recipe calls for 1/2 teaspoon, but I think more oregano is better in Tex-Mex recipes)

1 cup shredded cheese (The original recipe calls for cheddar; we used colby jack or a taco/nacho blend)

1/4 cup chopped green onions

2 tablespoons melted butter

flour tortillas (We used the medium ones, but I always tend to have more left over filling than the recipe calls for, so have more ready than the 6 the recipe calls for)

Warm tortillas wrapped in aluminum foil 5-10 minutes in a 400 degree oven.  The original recipe suggests that this will make them more pliable and easier to fold, and I have to agree.

In a bowl, mix together the filling ingredients:  chicken, salsa, seasonings, cheese, and onion.  Spoon 1/3 cup filling on the middle of each tortilla and roll up burrito-style:  lift the bottom up, fold in the sides, and roll up to make a covered cylinder (this is also the process for egg rolls).  Place seam-side down on a baking sheet sprayed with non-stick cooking spray.

Brush tops and sides with melted butter.  Make sure to have a bit of space between the tortillas so they don’t stick together and they crisp up properly.  Bake 25 minutes, checking often the last ten minutes to ensure that the tortillas don’t burn.  The goal, as the original recipe recommends, is for the tortillas to be crispy and golden brown.

Garnish with appropriate toppings (We ate ours with salsa and sour cream).

These were Muffin Approved because he didn’t realize green onion was present.

Muffin Approved

A Catch-Up Post: Mini BBQ Cheddar Meatloaves

In our family, we like meatloaf.  We love barbecue sauce.  And we adore cheddar cheese.

When I came across the Mini BBQ Cheddar Meatloaves recipe on Life in the Lofthouse, I was super jazzed…for a number of reasons.

Reasons #s 1-3 are listed above (meatloaf, bbq sauce, and cheese).

Reason #4 is that I have not had a fail on any of the recipes from Life in the Lofthouse.

Reason #5 is that mini as equates to food means portion-controlled and fast cooking.  Meatloaf takes over an hour if we make a full sized one, so the second half of that reason is super great!

This recipe, needless to say, is Muffin Approved.

Muffin Approved

Mini BBQ Cheddar Meatloaves

Adapted from Life in the Lofthouse

1/2 pound each ground turkey and ground pork (This is the main deviation from the original recipe)

1 beaten egg

1/4 cup barbecue sauce, plus another 1/4 cup barbecue sauce for brushing on the loaves (1/2 cup total)

1 tablespoon Worcestershire sauce

1/4 cup panko bread crumbs

salt and pepper (pepper must be freshly ground)

2 ounces cheddar cheese, cubed into tiny cubes

Set your oven to preheat at 400 degrees.  Line a half-sheet pan with foil.

Mix until just combined all ingredients except 1/4 cup of barbecue sauce in a medium bowl. Divide and shape into four loaves.  Place each on the baking pan.  Spread barbecue sauce on the top of the loaves.

Bake for 20 minutes until done.

Enjoy the sweet, cheesy, slightly spicy, meaty goodness!  Note:  We served ours with seasoned-battered fries (from frozen) and pickle stalks.

A Catch-Up Post: Sour Cream Noodle Bake

That picture really doesn’t do it justice.  This recipe is a godsend in egg-noodle form.

(And I’m usually not a fan of egg noodles.)

A few things went wrong with this picture.  I had obviously already started eating.  Sometimes this happens before I can take a glamour shot of the dish.  To me, that makes it more authentic.  I can gussy it up (and I have before), but it shows me that I actually liked the dish enough to take a picture of it after having a bite.  Meaning that it was blog worthy.

The second problem is that this was during my time of using filters in Camu, so it really doesn’t look like that.  A bit more red and a bit less yellow, in fact.

I first saw this recipe on Pioneer Woman’s Food Network show.  She sets it up as a freezer meal, and the next time I make it I’m going to make two and freeze one.  It’s easy cheesy and peasy.  Well, not peasy, but peas of all kinds would go well with it.

She stresses the need to make it in separate layers, almost like a lasagna.  I have since seen it other places where they mix it all up in a big hodgepodge.

Even though it makes the process a bit more difficult, I have to agree with the layered, strata method.  So that you don’t ruin the effect, make sure to let your baked casserole sit for 10-15 minutes to “re-solidify” and be cut-able.  Otherwise, you end up with hodgepodge (see the picture above).

One aspect I love about this casserole (that Muffin, of course, does not) is the green onion.  The lovely little bits of green and white confetti really brighten up the flavor and make it not just another casserole.

Sour Cream Noodle Bake

Adapted from Pioneer Woman via Food Network

1 1/4 pounds ground meat (The chief deviation from her recipe:  I used ground turkey)

15-ounce can tomato sauce (or two 8-ounce cans if you can’t find it or already have the 8 ouncers in the pantry)

1/2 teaspoon salt

pepper, freshly ground, of course

8 ounces egg noodles (half of a 16-ounce bag…see how it’s made for doubling and freezing one?)

1/2 cup sour cream

1 1/4 cups small curd cottage cheese

1/4-1/2 teaspoon red pepper flakes

1/2 cup thinly sliced green onions, plus more for topping

1 cup sharp cheddar, shredded

*Note:  Ree Drummond recommends grating your own cheese.  It really gives a much better melting result (other than the negative effect of fingernail breaking).

Now, that I’ve grossed everyone out, I’ll continue with the directions.

If cooking immediately (AKA not freezing), preheat the oven to 350 degrees.

Brown the meat in a large skillet and drain meat.  (I’ve been known to forget this step and end up with an oil slick in some dishes…sorry.)  Add tomato sauce and stir.  Add salt and pepper and stir, leaving the skillet contents to simmer while you prepare the rest.

Boil noodles in salted water until al dente.  Don’t overcook or you will have mushy noodles in the casserole.  Drain and set aside (but don’t rinse).

Now for the white ingredients:  combine the dairy ingredients (sour cream and cottage cheese) in a large bowl.  Stir in green onions, pepper and pepper flakes.  Stir the noodles into the mixture.

Spray a large baking dish with nonstick spray.  (You will need a deep 9×13 dish or larger.)  Make a bed of half of the noodle mixture on the bottom.  Then layer on half of the mixture of meat and top with half of the cheese.  Repeat the layers.  Top with extra green onions.  (This makes it totally delish!)

Bake until the cheese is melted and bubbly, approximately 20 minutes if your other ingredients were warm (meat sauce, noodles).

WAIT at least 10 minutes before cutting into the dish.

Serve with warmed crusty French bread.

This recipe (once Muffin removed the green onions) was Muffin Approved!

Muffin Approved

A Catch-Up Post: Bourbon Street Chicken

If there were ever another “genre” of ethnic food that comes close to overtaking Tex-Mex in Muffin’s heart or mine, it would be “Chinese.”  Notice that “Chinese” is in quotes.  A lot of what Muffin (and I) adore about Chinese food is more Americanized Chinese.

Yes, I mean that we like it more than Italian (although Josh’s lasagna does challenge it a bit).

It’s one form of cooking where you can virtuously chomp on crunchy veggies and pretend you are eating really unhealthy food.

Think Shredded Pork with Garlic Sauce.  Or fried (in our case, not-so-fried) rice.  Or stir-fried veggies.

The combinations of all are endless.

Of course, today’s catch-up post has (cough cough) no veggies, although I did stir fry some frozen broccoli (pretty much the only way to save frozen broccoli from becoming scary, limp, gray mush) with garlic and pepper flakes.

Today, I present you to that quasi-Chinese dish of mall “Chinese restaurants”:  Bourbon Street Chicken.  Our school district serves a version of this dish sometimes, but because they don’t want the students to associate it with alcohol, the district nutritionists have changed the name to “New Orleans Chicken.”

In reading the menus for weeks to my students, it took a VERY long time to figure out that they really meant Bourbon Chicken.

I found this recipe, well, this version, because it seems that many blogs have this recipe somewhere, on Life in the Lofthouse.

Bourbon Street Chicken

Adapted very closely from Life in the Lofthouse

1 pound boneless skinless chicken breasts, cut into small cubes (LitL calls for 4 chicken breasts, which to Albertson’s meat packers way of thinking, equates to 4 pounds instead of the pound I’m sure she intended)

2 tablespoons veg oil

2 minced garlic cloves

1/4 cup apple juice (She says apple or pineapple, but we always seem to have apple in the house and rarely seem to have pineapple)

1/3 cup brown sugar

2 tablespoons ketchup

1 tablespoon apple cider vinegar

1/4 cup water

1/3 cup soy sauce

pinch red pepper flakes

1 tablespoon cornstarch

In a large skillet containing medium-high heated oil, cook chicken pieces until no longer pink (stir-fry style).  Remove chicken and pour out any juices.  Return skillet to the heat.  Add chicken back to pan.

Mix together remaining ingredients in a medium bowl.  Whisk until cornstarch is completely combined.

When chicken is golden, pour sauce into pan. Stir to coat chicken.  Reduce heat to low and cover with the lid at an angle to allow steam to escape.

Simmer 20 minutes, stirring a few times.

Serve over rice with choice of veg.

Since this was served with “trees” (broccoli), this entire meal was Muffin Approved.

Muffin Approved

A Catch-Up Post: Crockpot Thai Peanut Chicken

I made this recipe in March when we had company.  A friend and former/possibly future coworker of Josh’s was staying with us while his apartment was readied.  This recipe was on the menu already when Josh invited him to stay with us.

Sadly, this was not a dish that anyone (other than Muffin and me) enjoyed.

The funny thing about this is that I grew up not liking peanut butter unless it was mixed with chocolate.  So, to enjoy peanut butter, especially in a savory dish, is nothing short of miraculous.

Muffin really seems to like these pork and chicken shreds over rice dishes.

Josh, who could eat peanut butter sandwiches possibly every day, can’t stand the idea of peanut butter and meat.  He also doesn’t like mole (just imagine the accent is over the e–pronounced mo-lay) because of the chocolate and meat connection.  (That was an early date of ours that was not good eats for Josh.)

To me, the peanut butter simply adds an earthy depth of flavor.

And to me…anything with cilantro garnish sprinkled over the top has to be good.

I am trying to expand our culinary repertoire to some of the Asian and African countries.  However, peanuts, though very common in African cuisine, as well, do not belong in a sweet potato salad containing sweet potatoes, green onions, and peanuts.

That was probably the worst thing that I have ever put in my mouth.  Ever.  Wait, no probably to it.  It was.  The.  Absolute.  Worst.  Thing.  Ever.

And I like/love all three of those ingredients by themselves.  Sweet potatoes:  major love, except in savory dishes.  Like kale chips, sweet potato fries are one food application I simply cannot do.  Peanuts I’ve grown to be okay with.  Green onions?  Possibly my favorite relative of that food family.  But together?  That should never happen.  EVER!

But this dish?  True awesomeness, at least to Muffin and me.

Crockpot Thai Peanut Chicken

Adapted from Family Fresh Meals

2 pounds boneless skinless chicken breasts

1 small red bell pepper, sliced

1 small yellow bell pepper, sliced

1 onion, chopped

1/2 cup chunky peanut butter

1 tablespoon lime juice (plus wedges for serving)

1/2 cup chicken broth

1/4 cup soy sauce

2 tablespoons honey

prepared rice or noodles

Garnishes:  lime wedges, 1/4 cup chopped cilantro, 1/4 cup crushed peanuts (which I forgot every time I served it)

Place vegetation (peppers and onions) in the bottom of the slow cooker to serve as a bed for the chicken to rest upon.  Place chicken on top.

Whisk together peanut butter, lime juice, soy sauce, chicken broth, and honey in a smallish bowl.  Pour the sauce over the chicken.

Cook on LOW in a smallish slow cooker (I used Red) for six hours.  Shred chicken and return to the crock for fifteen more minutes of cooking.

Serve over rice and noodles with appropriate garnishes.

Muffin Approved

(I don’t know if I’ll be able to repeat it though, unless it’s another week when Josh is on call.)

A Catch-Up Post: Sloppy Joes and Sloppy Joe Squares

This is another recipe made when Josh’s friend Troy stayed with us while waiting for his apartment to be ready.  This one everyone liked much better than the Crockpot Thai Peanut Chicken.

I was already somewhat familiar with at least part of the recipe that I found at Life in the Lofthouse.  I had previously made Sloppy Joes using the filling mentioned in the recipe.  Pretty awesome, as far as Sloppy Joes go.

As a casserole, it’s almost a one-dish meal.  All you need to do is add a veg or two.  You could even easily add peppers or a bit more onion to the meat mixture to make it more healthy.  Just remember that it is a casserole, so it needs to sit for a few minutes after you take it out of the oven for it to “set up.”

When we were first married, Josh wanted me to make Sloppy Joes.   I didn’t have a “go to” recipe, and I refused to pay for a can of Manwich.  Something about that just seemed wrong.  Maybe if the meat were included in the can, it wouldn’t be such a bad price.

So, it wasn’t until I found this recipe that I found a Sloppy Joe recipe that I could live with.

I’ve now made the squares a couple of times and have altered it slightly to make it more manageable for me.

First of all, we don’t always have ground beef.  It’s usually ground turkey or ground pork for us.  Ground pork is easier for us to manage because pork loins often go on sale for under $2/pound.  So, the meat factory bee-sheen gets a workout.

Sloppy Joe Squares

Adapted from Life in the Lofthouse (link above)

*Note:  For Sloppy Joes, omit the crescent roll dough and cheese.  Follow the process for the meat mixture as directed.

1 tablespoon butter

1/4 cup onion, chopped

1 pound ground meat

1 cup ketchup

1/2 cup water

1/4 cup brown sugar

2 tablespoons Worcestershire sauce

1 tablespoon red wine vinegar

2 teaspoons chili powder

1 teaspoon salt

1/2 teaspoon black pepper, freshly ground

1-2 sheets of crescent roll sheets (found with the other crescent rolls–It saves having to press the seams together)

2 cups shredded cheddar cheese

Preheat the oven to 350 degrees.  In a skillet over medium heat, melt the butter.  Add the onion, and cook until soft and translucent, but not brown.  Brown the meat with the onion.  Drain any fat.

Add all other ingredients (besides crescent roll sheets and cheese).  Stir to combine.  Reduce heat and simmer 20 minutes.  (Stop here and serve over buns if you are having Sloppy Joes.)

Roll out the crescent roll sheet and press into the bottom of a 9×13 pan.  Press until the dough comes up half an inch on the sides.  (This one can be omitted if you are trying to be a bit more carb conscious.)

Pour the meat sauce mixture over the dough and spread to make it all even.  Sprinkle with the cheese.

Cover the mixture with the remaining roll of dough.

Bake on a lower rack of the oven for 30 minutes.  If the bottom is still doughy, cover the top with foil and cook a few minutes more.

Let the casserole rest out of the oven for a few minutes before cutting into it–especially if you omit the bottom crust!

Both versions of this recipe are Muffin Approved–but he really likes it as a Sloppy Joe on a bun!

Muffin Approved

A Catch-Up Post: Fuji Chicken

This is a post that could be subtitled:  when it says use low-sodium soy sauce, they mean it!

I’ve never bought low-sodium soy sauce before.  I prefer to use full-flavored fun.  So, when I used the high-octane stuff in the sauce in this dish, it turned into a salt lick.

Muffin, however, adored it.  It had hand-julienned stir fried carrots and bias-cut snow peas, of course.  It had crunchy chicken.  It had a salty sauce made with apples.  It was over rice and fancy.

He loved it.

I loved every aspect except my massive mess-up on the sauce.

Josh couldn’t get past the sauce.

Lesson learned:  I purchased two bottles of the low-sodium stuff for next time.  And there will be a next time.  (Evil laugh)  There’s always a next time!

Be prepared to use many (if not most) of your stove top cooking vessels on this one.  I would volunteer someone else to do dishes on the night you serve this.

Some components are good enough on their own.  The carrot-and-snow-pea stir-fry would be a great side for any “Chinese” dish.  Or as a side for the chicken with some flavored rice (or even couscous…if you can get back the feeling that you are trying to eat large grains of sand or tiny eyeballs).

That’s pretty awesome that you can extract two components of this dish that would be awesome as their own dish (main or side).

Because of all of the food prep, I wouldn’t consider this a weeknight meal, unless you do all of the prep possible on the weekend and make it on a Monday or Tuesday.

I may have mentioned this in the past, but Muffin loves “Chinese” food, just like Josh and me.  When I asked him on a recent eating-out day (when the meal plan simply was not…going…to…happen…It was too hot to contemplate anything), he promptly said “Chinese.”

Maybe that’s why he likes this dish so much.

Fuji Chicken

(Followed exactly from Mandy’s Recipe Box)

1-1 1/2 pounds-worth of boneless skinless chicken breasts, divided into four pieces if not four individual breasts

1/2 cup flour

2 eggs

2 tsp milk

2 cups panko crumbs (They must be panko to get the crunchy)

1 1/2 cups matchstick carrots (I cut by hand, and it took forever)

2 1/2 cups snap peas, cut in half diagonally

4 cups of rice (You may have extra to make rice pudding or fried rice at a later date)

veg oil or canola oil

1 cup soy sauce (USE LOW-SODIUM)

2 tablespoons water

2 tablespoons brown sugar

1/2 teaspoon ground ginger

1 tablespoon (possibly more) cornstarch

1 medium Fuji or granny smith apple, peeled and cut into matchsticks

Preheat oven to 350 degrees.

Take your aggression out on the chicken:  Place each chicken breast (one at a time) in a quart-sized zippy bag.  Pound with your mallet to thin and even (in thickness).  Repeat with remaining chicken.

Take out three shallow dishes.  Put flour in one.  Whisk together eggs in milk in one.  Place panko in the third.  Using one hand (Seriously, only one hand needs to be club hand…you need one clean hand to turn on the faucet to wash the other off.  Keep your other hand behind your back.  Do it!!!), dredge each breast in flour, dunk in the egg mixture, and roll until coated in panko.

Heat a large oven-proof skillet over medium high heat.  Add in oil (one tablespoon).  Cook each side of each chicken breast 2-3 minutes per side.  Place chicken in preheated oven and continue to cook 15-20 minutes (or until done).

While waiting for the chicken to finish, make the sauce by combining soy sauce, water, brown sugar, ginger, cornstarch, and apple in a pot on the stove.  Whisk constantly.  Bring to a boil and boil one minute.

Reduce heat and simmer five minutes.  Check the consistency of the sauce.  Add water (too thick) or cornstarch (too thin), as necessary.

In the same pan that held the chicken (so, yes, after the chicken is done), stir-fry the veggies in 2 teaspoons of oil until crisp-tender (stir-fry consistency).

Slice chicken into strips and place the strips together puzzle-style.

On a plate, make a bed of rice.  Add a layer of veg on top of the rice.  Arrange one piece of chicken’s strips artistically with little spaces between over the veggies.  Drizzle sauce artistically yet copiously over all.

Serve with remaining sauce.

Enjoy this completely Muffin Approved dish!

(In fact, I promised him a while back that I would make it again.)

Muffin Approved

A Catch-Up Post: Mexican Pizzas

Trivia question:  What is the most overpriced item on Taco Bell’s menu?

Answer:  Their Mexican Pizza, of course.

It also happens to be, perhaps, my favorite item on their menu (with the Beef Mexi-Melt).  You do remember where I explained that I ate Tex-Mex breakfast, lunch, and dinner throughout my third trimester with Muffin, right?

I wasn’t kidding.

It’s not that I was craving it (at least, any more than normal).  It was that I was pregnant, and I wanted to encourage my son’s taste buds to like Tex-Mex in the womb.  And I was having a normal (non-pregnancy) craving that my pregnancy left me free to indulge.

Seriously.

My bouts of pregnancy insomnia were spent (to Josh’s irritation) banging pots and pans around at 2 and 3 in the morning in order to make a nacho bake or enchilada casserole that I just had to get done before morning.

I didn’t need to eat it or anything. (There were probably taco leftovers in the fridge.  I just needed to cook it to ensure that we would be able to have Tex-Mex the next night and for leftovers.)

Yup.

That’s me.

Has anyone noticed how, umm, skimpy the Mexican Pizzas have become in the last few years?  When I found the recipe for them at Life in the Lofthouse, I decided to load them up to make them a meal on their own.

In other words, if I’m going to eat one, let it be worth the calorie splurge.

As you can see from the picture above, I may have gone a bit overboard.  Just a bit.  Possibly.

I had trouble finishing a whole one.  I considered it a successful experiment at that point.

One thing that I would really stress that isn’t mentioned in the original post:  Poke a few holes in your tortillas with a fork in order to keep them from blowing up like balloons.  Trust me.  Balloon tortillas make the process a bit problematic.

This is best completed with an assembly line process, getting the whole family involved.  It becomes way too complicated if you use one person to do it all.

Mexican Pizzas

Adapted from Life in the Lofthouse

1 pound ground meat (I think we used turkey)

1 packet taco seasoning (or homemade)  If you use store-bought, try to find a lower sodium one.

1/2 cup water

8 fajita-size/small flour tortillas

1 (15-16 ounce) can refried beans, warmed (or homemade)  If canned, you may want to loosen the beans with a bit of water. (Think the consistency of Taco Bell’s Pintos and Cheese.)

1 (15-16 ounce) can enchilada sauce (If you have a great homemade one, leave me a line below–which will go to my e-mail–so that I can try it out.)

1 cup shredded cheddar cheese

1 cup shredded pepper jack cheese (I would probably use regular Monterey jack for Muffin next time.)

1 tomato, diced

2 green onions, diced

1 small can sliced ripe olives

Preheat oven to 375 degrees.  “Dock” the flour tortillas in several places with a fork.  Spray both sides of each tortilla with non-stick spray.  Place four tortillas each on a half sheet pan.

Place in the oven and bake five minutes.  Turn carefully while in the oven and bake another five minutes.  The goal is golden and crispy.

Remove from the oven and stack carefully on a paper towel.

Meanwhile, make the taco meat by browning the ground meat in a large skillet over medium heat.  Stir in taco seasoning and water.  Bring mixture to a boil and then simmer 10 minutes.

The building process:

Place one tortilla on the (hopefully cooled) sheet pan.  Spread a thin layer of refried beans on the tortilla.  Top with 1/4 of the meat mixture.  Place another tortilla on top of the meat.  Spread 3 tablespoons of enchilada sauce on top of the tortilla.  Sprinkle with both of the cheeses.  Add a few slices of green onion, tomato, and olives.

Repeat with remaining tortillas.

Bake ten minutes until cheese and sauce is bubbly.  Let sit a few minutes before cutting and serving.  By the way (I am not receiving any compensation for this), if you have one of those red Xyliss pizza cutters that Alton Brown used to use on Good Eats, use that.  If you don’t, get one.  It makes the cutting process of these pizzas (relatively) mess free.

These were Muffin, Muffin’s Mama, and Muffin’s Dada (Josh) Approved.

Muffin Approved