
Several months ago (March 2015), chimichangas were on the menu. I actually made them then, but didn’t blog about them. Awful of me, I know. As the school year gets ready to begin (I’m writing this in mid-July 2015), I figured that it would be best to have a post or two (or ten) ready to go in case life (and work) happens.
This is the first post I have planned for that eventuality.
Can you tell that I love Tex-Mex food? I literally ate it breakfast, lunch, and supper throughout the last trimester of my pregnancy with Muffin. For months after Muffin was born, Josh put his foot down…no tacos, enchiladas, etc. (Note: I would eat leftovers for breakfast and lunch.)
I’m always looking for recipes to expand my repertoire of Tex-Mex recipes. As a child, some of my happiest (food) memories were when my mom would make “Mexican” (tacos…and sometimes tostadas). I’ve discovered, as I’m sure my mom discovered then, that tacos and the like are easy entry points on getting kids to try normally-not-kid-friendly veggies.
In Muffin’s case, he will have everything on his taco except onion (and he is okay with cooked onion in the taco meat). Literally everything. I still have nightmares about the pretzel taco…not to mention the blueberry taco. Shudder.
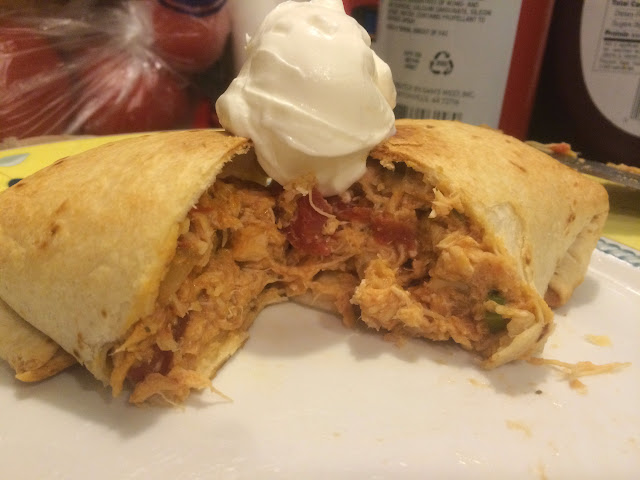
When I found this recipe on Culinary Couture, I was very excited because the chimis are baked, rather than fried. I have nothing against frying anything, but sometimes when I fry things like pies, egg rolls, wontons, or chimis, they burst open and the filling leaks out.
Totally not Muffin Approved.
They do crisp up nicely; however, if you plan on having leftovers, expect them to be kinda more like a soft chicken burrito.
I do plan on trying different fillings (to be more various and versatile) in the future, but the method (and the filling) work perfectly.
Baked Chicken Chimichangas
Adapted from Culinary Couture
2 cups chicken, cooked and shredded (I used some cooked with taco seasoning in the slow cooker)
1 cup chunky salsa (not runny picante sauce or restaurant-style blended salsa)
1 teaspoon ground cumin
1 teaspoon oregano (The original recipe calls for 1/2 teaspoon, but I think more oregano is better in Tex-Mex recipes)
1 cup shredded cheese (The original recipe calls for cheddar; we used colby jack or a taco/nacho blend)
1/4 cup chopped green onions
2 tablespoons melted butter
flour tortillas (We used the medium ones, but I always tend to have more left over filling than the recipe calls for, so have more ready than the 6 the recipe calls for)
Warm tortillas wrapped in aluminum foil 5-10 minutes in a 400 degree oven. The original recipe suggests that this will make them more pliable and easier to fold, and I have to agree.
In a bowl, mix together the filling ingredients: chicken, salsa, seasonings, cheese, and onion. Spoon 1/3 cup filling on the middle of each tortilla and roll up burrito-style: lift the bottom up, fold in the sides, and roll up to make a covered cylinder (this is also the process for egg rolls). Place seam-side down on a baking sheet sprayed with non-stick cooking spray.
Brush tops and sides with melted butter. Make sure to have a bit of space between the tortillas so they don’t stick together and they crisp up properly. Bake 25 minutes, checking often the last ten minutes to ensure that the tortillas don’t burn. The goal, as the original recipe recommends, is for the tortillas to be crispy and golden brown.
Garnish with appropriate toppings (We ate ours with salsa and sour cream).
These were Muffin Approved because he didn’t realize green onion was present.