The 25 Days of Holiday Goodies Day 16: Mom’s Cheesecake

25 Days of Christmas Goodies Button

This is arguably Muffin’s second-favorite dessert. He absolutely loves my mom’s cheesecake. And this one comes from River Road Recipes (of Spinach Madeleine fame), the Junior League Cookbook of Baton Rouge.

It is called Best Ever Cheesecake for a reason—it truly is the best ever!

And, in growing up, I learned two valuable lessons from my mom concerning this cheesecake: 1) how to fold egg whites into a richer batter and 2) never let your springform pan out of your sight.

It’s a big deal! Well, both of those are very important life skills.

This cheesecake, when prepared correctly, is light and fluffy instead of dense and heavy.

Best Ever Cheese Cake

Source: River Road Recipes

15 graham crackers

¼ cup butter or oleo (Do they even make it anymore with that label?)

4 eggs, separated

1 cup sugar

1 teaspoon vanilla

1 pint sour cream

3 eight-ounce packages soft cream cheese

Set oven to 350 degrees. Grease bottom and sides of 9” x 3” aluminum spring form pan generously. Roll graham crackers fine. Melt butter and combine with crackers (the recipe says with 12…we do all 15 and not sprinkle some on the top). Cover bottom of pan with this mixture. Beat egg whites stiff and set aside. In large mixing bowl of mixer combine cream cheese, egg yolks, ¾ cup of sugar, and vanilla. Beat until smooth. Fold in stiff egg whites. Place mixture in pan on top of cracker crumbs and bake for 40 or 50 minutes or until slightly brown. Remove from oven and pour slowly over top the sour cream mixed with remaining sugar. Return to oven at 475 degrees for five minutes. Remove from oven and cool. When cold, place in refrigerator for at least 12 hours before serving.

This recipe is completely Muffin Approved!

Muffin Approved

What is your favorite cheesecake topping?

The 25 Days of Holiday Goodies Day 7: Velveeta Cheese Fudge

25 Days of Christmas Goodies Button

Today’s “goodie” comes from one of the most hospitable people I’ve ever met.

Back in the early-to-mid 90s, my sister was dating, then engaged, then married to the man who became my brother-in-law.

In the evening of every holiday, we would go to his parents’ house.  Regardless of outside temperature, there was a bonfire outside and a myriad of my brother-in-law’s family.

Inside, the food varied by season.  Summer saw not-quite-mature green tomatoes, breaded and fried to golden perfection, tart and crispy and dunked in ketchup by an awkward and awestruck teen, who had newly discovered that Southern delicacy at my sister’s future mother-in-law’s side.

In wintertime, Christmas meant Velveeta Cheese Fudge, mild in flavor and melty in mouth feel.  During the following years, I must have consumed pounds of both–all prepared by my brother-in-law’s mother’s hands.

Each holiday, she opened the doors to her family–her sisters and their descendants and various spouses–and my family, from the time my sister and now-brother-in-law began dating.

She passed away in 2002, but memories of those gatherings, of her hospitality and her food, live on, for me, in my mind.

Velveeta Cheese Fudge

1/2 pound pasteurized process cheese food, sliced

1 cup butter

1 t vanilla extract

2 pounds confectioner’s sugar

1/2 cup cocoa powder

Spray lightly the bottom of a 9×9-inch square pan with nonstick spray.

In a saucepan over medium heat, melt the cheese and butter together, stirring constantly until smooth.  Remove from heat and add the vanilla.

In a large bowl, sift together sugar and cocoa.  Pour the cheese mixture into the sugar and cocoa mix and stir until completely mixed.  The candy will be very stiff.

Using your hands, remove candy from bowl an press evenly and firmly into pan.  Blot the top of the candy with a paper towel to remove the excess oil. Place pan in fridge until firm.

Cut into squares to serve.

These, by the way, are completely Muffin Approved!

Muffin Approved

The 25 Days of Holiday Goodies Day 3: Jezebel Sauce

25 Days of Christmas Goodies Button

If you are not from the South, you are probably laughing about the name.  From what I am able to glean online, the name comes about on account of its “wicked” heat.

Bland it is not!  There are MANY variations of the recipe, but the one my mom has always made came from River Road Cookbook (of Spinach Madeleine fame, the cookbook of the Junior League of Baton Rouge).

Growing up, I was the only way I would eat ham, cut into sugar-cube-sized cubes, impaled on a toothpick, and dunked heavily in the warmed, golden sauce.

I would also dunk Bisquick Sausage Cheese Balls in them growing up.

We’ve never slathered it over cream cheese and spread that on a cracker, but I have seen mention of it.

Oh, and it keeps “indefinitely” in the fridge, so it can make an appearance with both your Christmas ham and your Easter one.

Jezebel Sauce

Source:  River Road Cookbook

1 (10 ounce) jar apple jelly

1 (5 ounce) jar prepared horseradish (not horseradish sauce)

1 (12 ounce) jar marmalade

Mix all ingredients in a saucepan and heat until melted.  Cool to room temperature.  Serve with cubed pork on toothpicks (ham, sausage balls) or over cream cheese on crackers.  Store indefinitely in the fridge.

What is your favorite sauce for ham?

Meal Plan Monday: The Spring Break Edition

Meal Plan Monday

Good morning, Pinteresting Blogosphere!  It’s been an interesting couple of weeks.  I am hard at work on a side writing project (more info to come on that later–hopefully!), and IT IS SPRING BREAK!

It was great not to wake up at 5:30 (although I my internal alarm clock woke me at 6).

This week I’m trying a mix of old and new.  For my subscribers who get e-mails when I post, you know the joy (hopefully) of finding recipes that you would like to try.

Such happened to me when I recently received an e-mail update from Lynn’s Kitchen Adventures.   There was a recipe that totally intrigued me!  Now, I’ve tried a few taco/Mexican casseroles in my day, but this one looked really promising.  I will let you know Wednesday how it turns out (or when I get around to that post).  It’s a taco salad casserole.  Everything is all cooked and yummy, and then you sprinkle shredded lettuce on top (or, as Muffin calls lettuce, salad).

And when am I serving it?  Taco Tuesday, of course!

Also on the menu this week was a variation of my Great-Aunt Gene’s, Oriental Chicken Wings (I used chicken thighs).  I consider this truly a family heirloom recipe.  Yes, I mean the Great-Aunt Gene who made the “pina colada cake.”  I think next time I will make the chicken with the pina colada cake.  That would be a true tribute in her honor.

So, here is the menu plan for the week (including Easter weekend):

Saturday:  Oriental Chicken (Thighs), rice, corn

Sunday:  Easter Dinner:  My responsibility was the Honey Mustard Glazed Pork Loin with Cranberries.  My mom made her macaroni and cheese, baked sweet potatoes, and steamed broccoli (as well as cake mix brownies with chocolate cream cheese frosting).  I know I haven’t posted the pork loin recipe yet, but, trust me, grasshopper, it’s coming (and will be totally worth it)!

Monday:  Easter leftovers (I made us each a plate from the leftovers and left the rest of the roast with my mom.)

Tuesday:  Taco Salad Casserole (Lynn’s Kitchen Adventures), Spanish rice (think the Mahatma rice blend), chips, salsa

Wednesday:  Pizza Meatball Subs, chips

Thursday:  Creamy Swiss Chicken Bake, rice, green veg

Friday:  pizza and corn

Saturday:  Caramelized Pepper Chicken (Just a Taste), rice, egg roll

Sunday:  Another Lazy Day Sunday Casserole (Kayotic Kitchen), fruit

What’s on your meal plan for the week?

Family Heirloom Recipes: Chicken and Dumplins

Family Heirloom Recipes There are dishes in my family that have been created (at least) through three generations:  my great-grandmother, grandmother, mom, sister, and me (and sometimes my eldest nephew).  One of those recipes is my grandmother’s chicken and dumplins.  Yes.  Dumplins.  There is a recipe written on lined paper in my grandmother’s hand that says dumplins.  Unfortunately, she left off the recipe for the first half of the equation (as well as the all-important “juice” or soup). My late uncle Billy also had a chicken and dumplins recipe that was so close to my grandmother’s that eventually they melded.  My sister has spent the last several years perfecting the recipe.  My nephew even makes the recipe, and he’s 11. This is not a veggie broth chicken and dumplins.  This is chicken…and dumplins. And the “juice”/soup is what makes it.  At least in my opinion.  For some in our family, it’s the dumplins.  For me and a few others, it’s the juice.  I would be happy with a bowl of juice with one lone dumplin and one square inch of chicken.  I’m weird that way, I know. A few years ago, my sister invited me over to learn how to make chicken and dumplins.  I wrote down what she did, and I’m ready to share that with you now.

Chicken and Dumplins

1 whole chicken, cut up (do not think to get by with boneless, skinless chicken breasts–you need the big kahuna)

3 cups flour

1/2 cup shortening (Crisco)

1 teaspoon salt

water to make the dough

1 can evaporated milk + 2 tablespoons/pats worth of butter or an equal amount of half-and-half (My sister insists the half and half is closest to our grandmother’s recipe)

1 can cream of chicken soup

2-3 cans chicken broth, if necessary

Boil chicken.  Take out of broth to cool.  (My sister recommends cooking the chicken the night before and separating the chicken from the broth.)  Add broth if necessary to “boiled chicken water.”

In a big bowl, place dry ingredients and shortening.  Use whisk (my sister does not use a pastry knife) to cut shortening into the flour.  Add water and work with hands until workable (as a dry biscuit dough).  Roll, a “snowball size” at a time on a floured surface until “pie crust” thickness.  Cut into dumplins (strips 1″x2 1/2″) with a butter knife.

Heat the broth to a rolling boil.  Drop dumplins in one at a time.  Boil at “high” until there is a crackling noise, then reduce to about medium-high (“7” on your stove settings, if you have it).  While boiling, scrape the bottom of the pan, adding broth to ensure that nothing “sticks.”

Cook 15 minutes.  Whisk together cream of chicken soup and evaporated milk/butter (or half-and-half) mixture.  Add this and the chicken to the pot and stir gently.  Turn off heat and tightly cover with a lid.

When ready to serve, reheat over medium until hot.

Tip Tuesday: Make a Sunday Roast to Eat All Week

Tip Tuesday

I know I’ve probably mentioned this before, but this tip bears repeating (especially for those weeks when you really can’t think of anything to do for dinner).  If you make a really big roast, you should be able to eat for a few days of the following week (or at least make a few yummy lunches).

Thus is the truth with my mom’s slow cooker pork loin.  This was what we ate for New Year’s Day dinner (along with the hot water cornbread I made).  Muffin really liked the potatoes and carrots.  Of course, Muffin adores carrots anyway.  Sunday, as I prepared the carrots for the roast while he was eating breakfast, he asked for a “big carrot.”  I handed him one that I had already peeled, trimmed, and washed.

I have hopes that this will make several meals for Josh’s big cooker.  And a meal or two for Muffin and me in the upcoming week.

It really is an easy-cheesy recipe, especially the way my mom makes it (with baby carrots).  I tend to make it with peeled and cut up carrots (because that’s usually all we buy), but I figure that since I already have the vegetable peeler out for the potatoes, I might as well do the same with the carrots.

I know I probably use different amounts than my mom does (I tend to go very heavy on the potatoes and carrots because they are a family favorite…I could eat a huge bowl of them, alone, for lunch).

Another reason that I use the “big” carrots is that they are the most cost-effective way to buy organic.  Carrots tend to be my one organic splurge.  I know the rule is if you eat the outside, you buy that in organic, but I can actually taste the pesticide in the “inorganic” carrots.  And, they tend to be the most cost-effective organic.

Mom’s Pork Loin

Adapted from my mom’s application

1 whole (or half, if you are using a smaller slow cooler) boneless pork loin

6-8 large carrots (as opposed to baby), pared, trimmed, cut into sticks (of the size you would eat on a crudite platter)

6-8 small russet potatoes (in other words, save the bakers for another purpose), pared and cut into large-ish chunks (think rustic hashbrown size in a diner)

one large onion, peeled, cut into fourths, leaves separated

salt and pepper to taste

a handful of garlic cloves, peeled, optional (I used about half of a small bulb)

Arrange the onion leaves/petals/layers as a bed on the bottom of the crock.  Arrange the carrots above the onion.  Smoosh in the pork loin (Even in Big Bertha, this activity took some arranging to fit) into the crock.  Sprinkle with salt.  Crack copious amounts of black pepper over the top of the loin.  If using garlic, place the whole peeled cloves in gaps around the meat.  Stuff the remaining space with potatoes.  Cover.  Set heat to LOW for 8 hours.  At six hours, check every 30 minutes for doneness.  When done, remove the roast, slice, and serve on a platter.  Serve the vegetables and juices alongside.  Repeat as necessary and enjoy!

***

If I were making this on a workday, I would probably prep the vegetation the night before.  This entire dish makes fantastic leftovers!

25 Days of Holiday Goodies Day 25: Mom’s Potato Salad

25 Days of Christmas Goodies Button

Merry Christmas!  I have a special Christmas gift for you on the culminating day of the 25 Days of Holiday Goodies.  I made my mom dictate her potato salad recipe!

One of Josh’s favorite dishes that my mom makes is potato salad.  For him, it was love at first bite.  I have never attempted her potato salad.  Just as with my family-famous beans, her potato salad recipe is not written down…until today!  They always have to be served in the “potato bowl,” an avocado oval Corning dish from the 70s.  Yes, for those of you familiar with a certain Corner Gas episode of the same name, the potato bowl is THAT important.

Mom’s Potato Salad

4-5 potatoes

salt

1/2-1 yellow onion, diced

3 heaping tablespoons sweet pickle relish (she uses Vlassic currently because we buy the gallon jar of it at Sam’s and split it)

1-2 eggs, boiled, peeled, and mashed

1/4-1/3 cup mayonnaise (she uses Kraft)

1 tablespoon mustard

pepper to taste

a bit of paprika, sprinkled over the top

Peel and dice the potatoes.  Boil them in salted water until fork tender (just before mashing consistency is how it has always tasted).  Drain the potatoes and put them in the “potato bowl.”  (See above)  Gently stir in the remaining ingredients, making sure to leave the potatoes mostly intact.  Check the seasonings and add more salt and pepper, if necessary.  Refrigerate several hours until serving.

Most recently, we had this dish last night at the Christmas Eve present opening at my parents’ house.

IMG_0620[1]

Mom's Potato Salad

Potato salad isn’t exactly Muffin Approved.  I think it has something to do with the onion.  He likes everything else in the mix.

25 Days of Holiday Goodies Day 12: Cornbread Dressing

25 Days of Christmas Goodies Button

At Christmas and November Thanksgiving, we eat cornbread dressing.  We don’t add meats or nuts to it; we do add celery and onion (and mashed boiled eggs), but no high falutin’ fancy chunks.

We are unabashedly Southern in our dressing.  Cornbread has to be the base.  When I was younger, my sister and I would crumble the cornbread for my mom’s dressing.  We would have a modified food fight, a cornbread crumb fight.

Note:  I’ve been known to eat a bowl of leftover dressing for breakfast.

IMG_0566[1]

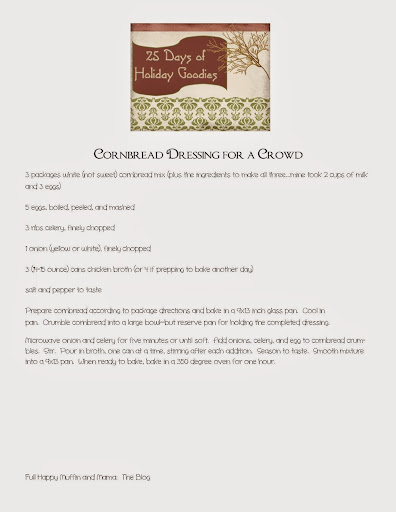
Cornbread Dressing for a Crowd

3 packages white (not sweet) cornbread mix (plus the ingredients to make all three…mine took 2 cups of milk and 3 eggs)

5 eggs, boiled, peeled, and mashed

3 ribs celery, finely chopped

1 onion (yellow or white), finely chopped

3 (14-15 ounce) cans chicken broth (or 4 if prepping to bake another day)

salt and pepper to taste

Prepare cornbread according to package directions and bake in a 9×13 inch glass pan.  Cool in pan.  Crumble cornbread into a large bowl–but reserve pan for holding the completed dressing.

Microwave onion and celery for five minutes or until soft.  Add onions, celery, and egg to cornbread crumbles.  Stir.  Pour in broth, one can at a time, stirring after each addition.  Season to taste.  Smooth mixture into a 9×13 pan.  When ready to bake, bake in a 350 degree oven for one hour.

25 Days of Holiday Goodies Day 11: White Bread Stuffing

25 Days of Christmas Goodies Button

This is the recipe that Josh’s mom gave me for stuffing.  We serve it every Canadian Thanksgiving.

This stuffing is a great way to use up the ends or “heels” (as my mom calls them) of the bread.  You can freeze them throughout the year as you use up the remainder of the loaf of bread.  I’ve started toasting the bread before cubing it; that makes for a better flavor and texture (more like croutons) in the final product.

IMG_0243

Stuffing (for turkey)

croutons or dried bread cubes – 4-5 cups or as needed, more or less

1 medium onion, chopped

2 or 3 large stems celery, chopped

3 tablespoons cut up parsley (or 1 tablespoon dried)

salt and pepper

1 or 2 eggs, slightly beaten

(1/2 cup milk)

1 cup chicken bouillon – broth (approximately)

Mix dry stuff and eggs.  Add remaining liquid until all damp but not soggy.  Put in turkey and the rest in a greased oven dish with lead.  Heat in the oven for an hour or so until heated.

And now for the printable:

Stuffing for Turkey

25 Days of Holiday Recipes Day 10: Boeterkoek

25 Days of Christmas Goodies Button

This is the other Dutch treat recipe that Josh’s mom gave to me.  Translated into butter cake, this almond-flavored buttery cake is baked in a pie pan.

Once the treat is baked, we cut it into the thinnest wedges imaginable (to allow for more servings).

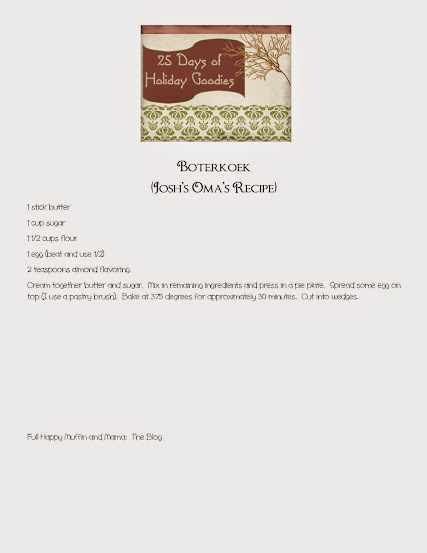
Boeterkoek

1 stick butter

1 cup sugar

1 1/2 cups flour

1 egg (beat and use 1/2)

2 teaspoons almond flavoring

Cream together butter and sugar.  Mix in remaining ingredients and press in a pie plate.  Spread some egg on top (I use a pastry brush).  Bake at 375 degrees for approximately 30 minutes.  Cut into wedges.


Muffin danced into the bedroom shortly after tasting it, and said “I really like this cake, Mama.”  I guess that makes it Muffin Approved.

Muffin Approved