Please Don’t Heat Up the Kitchen New Recipe Challenge: Grilled Eggplant Parmesan

Please Don't Heat Up the Kitchen New Recipe Challenge

Recently, we made a recipe a reader sent me from the newspaper in Naples, Florida.  The truly odd thing was, shortly after I received the recipe, someone offered me a whole bunch of eggplant, and I was going to make it then, but things happened.

Namely the eggplant went bad before I could arrive to receive it.

But Kroger has been having a New Lower Price! for eggplant (which I NEVER purchase by the way) of 99 cents each.

So, one day, I just had to buy the eggplant to make this.  Well, it involved the grill, and only Josh knows how to operate the grill in our house, so I did all of the prep work, and Josh cooked it.

We ended up serving it as a side, but this could so be a main dish for a meatless meal.  We served it with buttery garlic mushrooms and pork chops.

It tasted awesome, but there are a few changes I would make.

  1.  Eggplant skin is very chewy/rubbery when grilled.  Think chewing on a rain slicker.  I would grill it skin on but remove it before I begin building the yumminess.
  2. Make extra breadcrumb topping so that you (as the cook) can crunch on some with a spoon.  I didn’t and I regret it.
  3. Make even more extra breadcrumb topping so that you can add more topping on top of the stacks.  Trust me.  The topping rocks!

So, here is the plate o’goodness:

IMG_3184[1]

Yes, it truly is as awesomely beautiful and vibrantly colored as was in the picture.

And here’s what (Josh and) I did:

Grilled Eggplant Parmigiana

Source:  Naples News/Banner

1 large eggplant

kosher salt

3/4 pound roma tomatoes (often called plum)

2 T extra-virgin olive oil, plus extra for brushing on the eggplant

1 largish clove minced garlic

1/2 cup panko breadcrumbs (Panko is like sweetened condensed milk.  All recipes with it are automatically awesome!)

1 1/2 ounces freshly grated Parm cheese (no Kraft green cylinder)

6 ounces mozzarella cheese, coarsely grated

fresh basil, shredded a la chiffonade, to garnish

(Note:  Just noticed that the recipe calls for you to peel the eggplant.  Oops!  I still think grilling it first and then peeling it would work best)

Slice the eggplant in rounds 3/4 inch thick.  Salt both sides of each slice, then set the slices aside for 45 mins.  Slice the tomatoes into 1/3-inch-thick rounds.  Salt both sides of each slice and transfer the slices to a rack to drain until the eggplant is ready.

Prepare the grill with a hot and indirect cooking side.

In a medium skillet (inside the house) over medium low, combine the measured 2 T oil and garlic.  Cook, stirring, until your mouth waters from the smell.  Add the panko.  Increase the heat to medium and cook until the crumbs turn golden and crunchy, 2 to 3 minutes, stirring constantly.  Transfer to a bowl, stir in the Parmesan cheese, and set aside.  Repeat so that you have plenty to taste test and some extra for the topping.

Pat the eggplant slices dry and brush one side of each with olive oil.  Add to the grill and cook over the hotter side until the slices are nicely browned on the bottoms, 5 to 6 minutes.  Brush the top sides with more oil, turn the slices over grill until browned on the second side, about another 5 minutes.  While the eggplant is grilling, pat dry the tomato slices.

Transfer the eggplant slices to the indirect heat on the grill, then top each slide with enough tomato slices to just cover the top.  Top the tomatoes with 2 tablespoons (or more if you made more) of the panko mixture, then divide the mozzarella cheese evenly among the slices.  Cover the grill and cook 4-6 minutes until the mozzarella is melted.  Transfer 2 slices to each of the four plates and top each portion with some basil.

IMG_3185[1]

What is your favorite grilled veg recipe?

Tip Tuesday: Sometimes You Must Break the Rules…

Tip Tuesday

I’m a believer in following the rules.  I think I was a hall monitor in a former life.  Personal responsibility is a BIG thing with me.  Once I learned how to color within the lines, I tried never coloring outside of them.

For those of you who have read my (nearly countless) posts of how I altered recipes, therefore NOT following the rules, you are (justifiably) howling maniacally.

But my need to bend recipes to my will aside, sometimes there are times you need to BREAK THE RULES!

Even though I haven’t written an updated post (yah, yah) for the Please Don’t Heat Up the Kitchen New Recipe Challenge, I am trying to make sure that I don’t heat up the kitchen this summer of insane heat.

Repeat after me:  In.  Sane.

So, why would I make a recipe that not only heats up the stove coils for an extended period of time but also runs the oven for close to half an hour (plus pre-heat time)?

Because it is totally worth it.

Because it makes you think you are literally tasting summer.

The fresh and crisp and clean summer, not the insane (see above) summer.

The recipe comes from Debbiedoo’s (I just love that name), the blog that gave Muffin his favorite pork chop dish (Slow Cooker Dr. Pepper Pork Chops).  I figured that any recipe from that website would be totally Muffin Approved (and it was)!

What dish, to me, epitomizes summer?  Drumroll….Wait for it….

Quick and Easy Chicken Piccata.  Lemony.  With a crisp note of white wine.  And the one ingredient that makes me love chicken piccata:  capers!  Of course I forgot to add them until after the chicken was in the oven for a bit, but half a jar still went in there.

We served it with broccoli that was “stir fried” in the pan that had browned the chicken and made the sauce, cantaloupe, blackberries, and strawberries.  Eating the rainbow again.  My one regret is that I didn’t serve it with pasta.  It totally needed pasta.

And, as I was saying, with the exception of the capers (oh, well, more for me), Muffin LOVED it!!!  Of course this was a Muffin Approved meal all the way around:  two of his favorite fruits and one of his favorite veg.  For some reason, Muffin wasn’t that fond of the blackberries.  I loved them!

Anyway, here’s what I did:

Quick and Easy Chicken Piccata

(Followed almost exactly from Debbiedoo’s–see the hyperlink above)

IMG_3125

3 large chicken breasts (the thin end cut off as one piece then the thicker in divided into two pieces–halved horizontally–you will have 9 smallish pieces)

salt and pepper to taste

1 cup (ish) all-purpose flour

1 clove garlic, minced

1/4 cup fresh lemon juice (You are going to buy a fresh lemon anyway to slice and boil in the sauce, so 1/4 cup of juice isn’t that much of a hardship.  P.S. If you have a Muffin, he or she loves doing this part of the work.)

1 fresh lemon, sliced

1/2 jar nonpareil capers (the tiny bits of goodness)

2 tablespoons butter (The recipe calls for four tablespoons, but I was trying to finish off a stick of butter before it went rancid.)

vegetable oil

2 cups of white wine (I used Flip Flop Pinot Grigio.  No, I don’t get compensated by their parent company, but I wanted to let you know so you could produce consistent results.  And, I chose this one because I’m not fond of pinot grigio, and this one had a screw top–so that it could be easily saved for another cooking use.)

*Debbiedoo’s also uses parsley, but I didn’t use any.  If you want to find out how, check out the link above.

I started out by preparing the sauce ingredients (to avoid cross-contamination with the chicken):  sliced the lemon, juiced the lemons, measured out the wine, plopped in the butter, and forgot the capers.  Then, I prepped the chicken, dividing each into three pieces (see above) and mixing the flour with salt and pepper.  While prepping the chicken, I coated the bottom of a large pan in oil and started warming it on medium.

I then cooked the chicken (3-4 minutes each side) in two batches, evacuating the chicken to a 13×9 glass pan as it finished.  Once I started cooking the chicken, I preheat the oven to 325 degrees.

Once the chicken was browned, I poured in the sauce ingredients, starting with the wine, which deglazed the pan close to immediately.  I stirred them together and brought them to a “bubble,” then reduced the heat and let the sauce simmer for 10 minutes.

I poured the sauce over the chicken and plopped the 13×9 in the oven.  Sprinkle capers over the top (if you forgot to add them to the sauce as I did).  Bake 25-35 minutes.  I baked mine 25 minutes and it was perfection, very tender and flavorful.

Muffin Approved

What is your favorite dish that reminds you of summer?

We Plan Wednesday: A Possible Summer Holiday Dessert?

We Plan Wednesday

Yes, those summer holidays are right around the corner.  For those celebrating both Canada Day (July 1) and Independence Day (July 4), the time to plan is upon us.

This year, because of Josh’s wonky work schedule, we will be celebrating in between the two.  Last year, if memory serves me, we had a homemade Strawn’s strawberry pie as our dessert.  Yes, it is red and white (symbolic of both Canada and the United States–well, with blue), but we are gobbling up strawberries so quickly that there is no way we will be able to spare the two pounds for a pie.

Another option is a recipe I made (but did not blog) for Cinco de Mayo.  It’s greenish, so it would also work for St. Patrick’s Day.  But, what I really like about it for the two summer holidays, is that you don’t heat up the kitchen (other than the ten minutes for the crust) in all of the craziness.

What recipe am I talking about?  Kraft Recipe’s Margarita Cheesecake Pie.

Here’s what I did:

34 Ritz crackers, crushed (a great job for Muffin! or a mama with a need to whack and crush things!)

6 tablespoons butter, melted

2 large limes, divided

2 packages (8 ounces each) cream cheese, softened

1 can (14 ounces) sweetened condensed milk (Resist the urge to eat this can with a spoon.  You might want to change the amount to 2 cans so you can have a can to enjoy with a spoon.  Cooks perogative!)

1/4 cup FRESH lemon juice (not Real Lemon–resist the urge)

Heat oven to 350 degrees Fahrenheit.  Combine cracker crumbs and butter; press onto bottom and up side of 9-inch pie plate.  Bake 10 minutes or until golden brown.  Remove from oven; cool 5 minutes.

Meanwhile, zest 1 lime and set zest aside.  Cut zested lime in half.  Squeeze juice from lime halves.  Beat cream cheese and milk with mixer until blended.  Add lime and lemon juice; mix well.

Spoon cream cheese mixture into crust.  Smooth top.  Cut remaining lime into four lengthwise quarters, then cut each quarter crosswise into thin slices.  Arrange around edge of pie.  Sprinkle with zest.

Refrigerate 1 hour or until firm.

What is your dessert plan for these summer holidays?

Tip Tuesday: Sides that Won’t Heat Up the Kitchen (and a Dessert Idea, Too!)

Tip Tuesday

It’s extremely necessary to not heat up the kitchen in the summer.  Even assuming that your a.c. works perfectly (and that isn’t always the case), if you live in an area that tends to get the 9,000 degree heat with 500% humidity, heating up the kitchen defeats the purpose.

There are tons of recipes for the slow cooker, the grill, or that are not-to-be-cooked for main dishes (and even some desserts or sides), but a visit to my sister’s recently reminded me of other options that are cooling (and healthy to boot!).

Yes, I said healthy.  It’s not a topic often covered by this blog, but the summer is the time of year when I tend to reduce–a bit.  It’s too hot to eat for one thing.

For another, and the focus of this entry, there are so many yummy fresh fruits and vegetables available during this time.

While at my sister’s last week, for each meal eaten at home (and a particularly memorable snack time), she served a veggie tray and a fruit tray.

Let’s examine the complexity of the veggie tray.  At Christmas and Thanksgiving (with pickles and olives), we call such a thing relishes.  If you are attending a pinkie-extended cocktail party, you may speak in an upper-crust accent and call them cruditees.  If you purchase such a thing pre-made at the grocery store, you will see it called a vegetable tray.

In the summer, it should only be called a veggie tray, bringing to mind the idea of lazy summer days cooled by the crisp fresh veggies and dip (which could be sour cream-based, yogurt-based, or salad dressing).

Really, any raw vegetable is awesome.  Grape tomatoes, carrots, celery sticks, radishes, green onions, pepper strips (or mini bell peppers), broccoli, cauliflower, cucumber…the possibilities are endless.

I have been guilty (in the past) of purchasing veggie trays.  That’s okay (especially if they are marked down as reduced produce).  But there is something so satisfying about arranging them in a colorful melange of flavors and textures.

On Sunday, for the Father’s Day celebration, I created the one below.  I also made one to serve with the leftovers yesterday.  But Muffin started scarfing the tray before I could snap a pic.  Muffin loves the veggie trays a lot.  My mom even mentioned that, when he visited them on Saturday for lunch, he did a good job of decimating the veggie tray.

Note:  We’ve enjoyed the veggie tray for two days in a row.  I can definitely see this as becoming a regular side at our table (for supper or lunch…it would make a great addition to a ploughman’s lunch!).

They can also be as simple or elaborate as you wish.  The sky’s the limit!

And what, may you ask, is Muffin’s new favorite dessert?  One that would make the federal lunch guidelines happy, that’s for sure.

Muffin is very much fruit-obsessed.  I have seen him offered a choice of cake or fruit, and he will choose fruit almost every time.

While at my sister’s, he tried to decimate her fruit tray, gobbling handfuls of red grapes and wedges of watermelon interspersed with copious amounts of strawberries.

On Sunday, throughout dinner, he kept wheedling (there is no other word for it) to have some of the fruit tray that I made below.  I specifically kept it in the fridge so that he would eat some of the main part of his meal (other than the vegetable tray above).

Fruit trays can always be the most beautiful, decorative element on the table.  You can have the green of honeydew or kiwi, various berries in shades of red or blue (or purple), the many hues of grapes, the orange of cantaloupe, the red of watermelon, the oranges of various tropical fruits.  As you can see, I compiled chunks of honeydew (that I cut down some because I couldn’t find a whole on in the store, blueberries (Muffin ate the rest of the pint for breakfast), cherries, strawberries, cantaloupe, and watermelon (I had purchased a personal watermelon, sliced off the ends, and peeled the rind off the rest before cutting it in disks, and then fingers.).

There wasn’t much left of the tray (and the rest was gone the following morning after Muffin hit it).  The honeydew disappeared before we returned home with the tray.

The next day, I decided that would be the ideal dessert with the leftovers, so I replenished the tray.  I even bought strawberries and had leftover cherries that never made it on last night’s tray.  I purchased some organic blackberries that were 99 cents a 6 ounce package (that I didn’t realize were on sale).  I ended up buying two of them.  They were perfect.  Tight little berries.  If you were to paint a still life of blackberries, these would be your muse to recreate.

So, last night, for dessert with the leftovers (as well as a lovely chilled bedtime snack), this is what we feasted upon:

What are your favorite warm weather sides and desserts?

Meal Plan Monday: Wk 2 of the As-Yet-Unwritten Challenge

Meal Plan Monday

Happy belated Father’s Day to all of you wonderful dads out there!

Josh had to work yesterday, but we did get to have a nice Father’s Day dinner with my parents.  As I mentioned in last week’s MPM post, we had the Asian-Style Ribs, fried rice, a fruit tray, and a veggie tray.  All went perfectly.

(The chef’s sample.  I couldn’t resist!)

So, what else is on the plan for this week?

Well, let’s see…

Saturday:  hamburgers (grilled) and beans

Sunday:  Asian Style Barbecue Ribs, fried rice, fruit tray, veggie tray

Monday: leftovers from Sunday

Tuesday:  Taco Tuesday!

Wednesday: wedge salad with bacon and cheese, fruit

Thursday:  leftovers or hot dogs

Friday:  Slow Cooker Pizza (Crockin’ Girls), corn

Saturday:  Slow Cooker Coconut Chicken (The Recipe Critic), green veg

Sunday:  Quick and Easy Chicken Piccata (Debbiedoo’s), steamed broccoli, fruit

What’s on your meal plan this week?

Meal Plan Monday: Week 1 of a Returning Challenge

Meal Plan Monday

Versus

Please Don't Heat Up the Kitchen New Recipe Challenge

It’s that time of year again.  We need a respite from the summer’s heat.  So, I bring you Week 1 of the returning Please Don’t Heat Up the Kitchen New Recipe Challenge (more to come on the challenge Wednesday for We Plan Wednesday).

This week, my focus is two sources.  The first is another one of the Better Homes and Gardens Special Interest Publications (abbreviated below as BH&G SIP) Make and Take.  The other is a wonderful website that does the cost breakdown for recipes, Budget Bytes.

So, what’s up for this week?  Why, this, of course!

Saturday:  cookout with hot dogs and s’mores in the fire pit (Muffin has been dying to try s’mores)

Sunday:  grilled smoked sausage with peppers and onions

Monday:  Finger Lickin’ Barbecue Chicken (BH&G SIP Make and Take), beans, coleslaw

Tuesday:  Slow Cooker Rosemary Garlic Beef Stew (Budget Bytes), bread

Wednesday:  at my sister’s

Thursday:  at my sister’s

Friday:  leftovers or hot dogs

Saturday:  Slow Cooker Coconut Chicken (The Recipe Critic), rice, peas/beans

Sunday:  Asian-Style Barbecue Ribs (BH&G SIP Make and Take), fried rice, green veg (Father’s Day eats!)

What’s on your meal plan this week?  Oh, and if you have any recipes that need to make the list for the challenge, please let me know by dropping me a comment or two!  Thanks!  🙂

Meal Plan Monday: The Spring Break Edition

Meal Plan Monday

Good morning, Pinteresting Blogosphere!  It’s been an interesting couple of weeks.  I am hard at work on a side writing project (more info to come on that later–hopefully!), and IT IS SPRING BREAK!

It was great not to wake up at 5:30 (although I my internal alarm clock woke me at 6).

This week I’m trying a mix of old and new.  For my subscribers who get e-mails when I post, you know the joy (hopefully) of finding recipes that you would like to try.

Such happened to me when I recently received an e-mail update from Lynn’s Kitchen Adventures.   There was a recipe that totally intrigued me!  Now, I’ve tried a few taco/Mexican casseroles in my day, but this one looked really promising.  I will let you know Wednesday how it turns out (or when I get around to that post).  It’s a taco salad casserole.  Everything is all cooked and yummy, and then you sprinkle shredded lettuce on top (or, as Muffin calls lettuce, salad).

And when am I serving it?  Taco Tuesday, of course!

Also on the menu this week was a variation of my Great-Aunt Gene’s, Oriental Chicken Wings (I used chicken thighs).  I consider this truly a family heirloom recipe.  Yes, I mean the Great-Aunt Gene who made the “pina colada cake.”  I think next time I will make the chicken with the pina colada cake.  That would be a true tribute in her honor.

So, here is the menu plan for the week (including Easter weekend):

Saturday:  Oriental Chicken (Thighs), rice, corn

Sunday:  Easter Dinner:  My responsibility was the Honey Mustard Glazed Pork Loin with Cranberries.  My mom made her macaroni and cheese, baked sweet potatoes, and steamed broccoli (as well as cake mix brownies with chocolate cream cheese frosting).  I know I haven’t posted the pork loin recipe yet, but, trust me, grasshopper, it’s coming (and will be totally worth it)!

Monday:  Easter leftovers (I made us each a plate from the leftovers and left the rest of the roast with my mom.)

Tuesday:  Taco Salad Casserole (Lynn’s Kitchen Adventures), Spanish rice (think the Mahatma rice blend), chips, salsa

Wednesday:  Pizza Meatball Subs, chips

Thursday:  Creamy Swiss Chicken Bake, rice, green veg

Friday:  pizza and corn

Saturday:  Caramelized Pepper Chicken (Just a Taste), rice, egg roll

Sunday:  Another Lazy Day Sunday Casserole (Kayotic Kitchen), fruit

What’s on your meal plan for the week?

Meal Plan Monday: Hopefully This Will Be Followed a Bit Better This Week…

Meal Plan Monday

Last week’s menu did not go so well as planned.  Sometimes, things happen.  And, last week, things happened.  Or, rather, many things coalesced to make me not…want…to…cook.  I ate salads a lot last week.  It also is that lovely point in the year known as “It is way too hot to cook, thank you very much!”

It’s also way too hot to eat.  The heat index on concrete this evening as I headed home about five o’clock or so was 110 degrees Fahrenheit.  It is millimeters away from a hundred degrees actually.

There’s a reason why the slow cooker has again made successive appearances in the meal plan.  I’m not ready to do a full Please Don’t Heat Up the Kitchen New Recipe Challenge, but I’m going to find ways in the next few weeks (Louisiana in August is breathing its hot, acrid breath on the back of my neck already) to not heat up the kitchen as much as possible.

So…here…we…go (Most of the links except next Sunday’s dish can be found on last weeks MPM post):

Saturday:  Fourth of July bash re-do with hamburgers, beans, potato salad, ice cream sundae bar, my mom’s cheesecake

Sunday:  Southern Buttermilk Fried Chicken (adapted from A Bountiful Kitchen), rice, green beans (Muffin again tried to appropriate extra chicken)

Monday:  root beer pulled pork sandwiches (from RecipeGirl), coleslaw, chips (Um…this did not happen today.  I wasn’t hungry, Muffin ate leftovers, and Josh ate something else)

Tuesday:  Muffaletta casserole from Miz Helen’s, salad (I will hopefully be making the root beer pulled pork here)

Wednesday:  Chicken French (expect this one to be usurped as it was last week) from Ducks N a Row, rice, green veg

Thursday:  leftovers

Friday:  slow cooker red beans and rice, bread

Saturday:  fried rice

Sunday:  Crock Pot Coconut Lime Chicken (Crock Pot Gourmet), rice, appropriate veg

What’s your plan for this week?

Please Don’t Heat Up the Kitchen New Recipe Challenge: Thumbs Up and Thumbs Down

Please Don't Heat Up the Kitchen New Recipe ChallengeI’m trying to be more open about the bad.  I think I do okay opening up about the good, but this challenge has been…a challenge.  Monday I tried a new version of the Pizza Grilled Cheese Sandwich that I first saw on Forkful of Comfort.  I figured that a Hawaiian version would be great.  I love Hawaiian pizza (I especially love simply pineapple pizza), and it is a family favorite.  After the success of the salami version, I figured it would be AWESOME!  And it was.  Like totes.  🙂  Here’s the kicker:  it is the fastest recipe ever.  It takes as long as it takes to make grilled cheese.  And not being a fan of cheese singles, being able to use mozza really amps it up.  And…all I have to say is…pizza dipping sauce.  I swapped out the butter/margarine on the outside with mayo.  Mayo is easier to spread more evenly (none of the torn bread syndrome).

Think of this cheesy goodness.

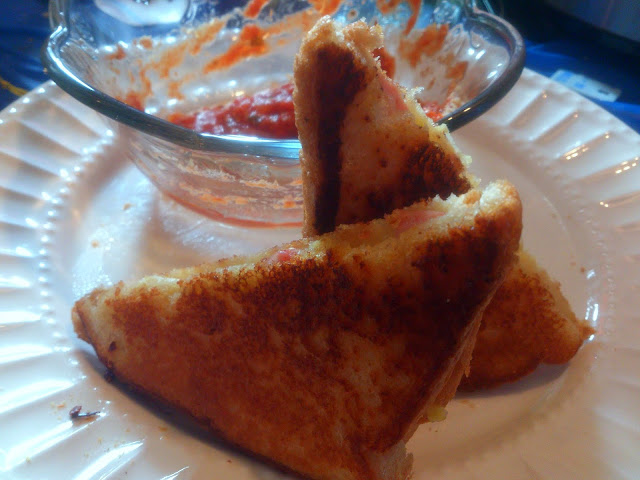
I may have already consumed one of the two sandwiches before remembering to take a shot of second of the two sandwiches.  As in, it was so super yummy I felt the need to inhale consume it instantly.  Here’s what we did:

Hawaiian Pizza Grilled Cheese

bread, sliced (We used cheapy-cheap white bread)

butter, margarine, or mayo to slather on the bread (one side of each slice of bread)

shredded mozzarella (enough to layer on the bread twice

half a slice of thinly sliced ham (or Canadian bacon) per sandwich torn into bits

half a small can of crushed pineapple (and to keep the sandwiches flat enough it needs to be crushed), very well drained

jarred or canned red pasta sauce of one’s own choosing, warmed

Slather butter, margarine, or mayo on one side of each slice of bread.  Sprinkle a generous blanket on the un-coated side of half of the bread slices.  Sprinkle with ham and pineapple bits in an amount of your own choosing, but make sure to allow some of the mozzarella visible.  Sprinkle on more mozzarella.  Place the un-coated side of the remaining bread slices on top of the mozzarella.

Heat a nonstick skillet over medium heat until hot (You may want to spray the surface with nonstick cooking spray).  Place the sandwiches on the pan (being sure not to crowd too much).  Once the underside is browned and the cheese is partially melted, flip each sandwich carefully.  Cook until browned on that side and cheese is completely melted.  Cut diagonally into either two or four triangles (Muffin’s preference).  Repeat for remaining sandwiches.

Serve with warmed pasta sauce for dipping.

This was the thumbs-up portion of the week and definitely Muffin Approved.

That was the good news.

The thumbs down was my fault.

I attempted to make Josh’s Oma’s meatloaf in the slow cooker.  I had similar results to the Chicken Parmigiana meatloaf.  If you overcook meatloaf it turns kinda sour tasting.  If I had stopped at the five hours on LOW that I had it set for, but I didn’t think it looked quite done, so I set it for another hour.  It resembled dark brown leather afterwards.  I managed to choke down a slice, but Josh and Muffin couldn’t.  I do have to say this:  Oma’s meatloaf is yummy enough to deal with heating up the kitchen for.  Although the culinary adventuress within me wants to try it one more time and stop it at five hours.  I think it would have been awesome.

I didn’t take a picture.

Tomorrow we consume pancakes and bacon.  I plan to use the recipe from Miss Kay’s cookbook (because I like it the best) but to make sure I don’t use expired baking powder.

What is your biggest culinary achievement or disappointment lately?

Muffin Approved

Well…the pizza grilled cheese, at least.


Family Heirloom Recipes: Pineapple and Cheese Salad

Family Heirloom Recipes

When I made the Simple Crockpot Chicken and Dumplings, I made one of the old standby sides for the dish in my mom’s family.  That was the pineapple and cheese salad.  This seems to be an acquired taste although growing up I found it to be so elegant.  You layer a few shreds (or leaves) of iceberg lettuce on a salad or dessert plate.  On top of that, you plunk one canned pineapple slice (or two, if you are feeling particularly decadent).  In the crater created by the absence of the pineapple core, you mound a teaspoon or so of mayonnaise (store-bought is fine).  On top of that, you sprinkle some cheddar cheese (the sharper, the better).

I should note that Josh does NOT like this salad.  The other day when I made it, he only wanted a pineapple slice.  I prepared Muffin a pineapple slice with cheese on top of it…and he liked it.

Shortly after my grandmother passed away (five years ago almost), I tried to find the origin of the recipe.  It didn’t appear that any cookbook published it.  Recently, I found a few versions that were close, but not exact.  You can swap out the pineapple for a canned pear half and the cheddar cheese for green-can Parmesan cheese.

Pineapple and Cheese Salad

From the Creative Minds of My Maternal Ancestors

For each salad:

2-3 leaves of iceberg lettuce (or several shreds of iceberg lettuce), arranged attractively on a dessert plate

1-2 canned pineapple slices (or canned pear halves)

1-3 teaspoons mayonnaise

1-3 tablespoons grated sharp cheddar cheese (or 1 tablespoon grated Parmesan cheese)

On the bed of lettuce, arrange the pineapple slices.  Fill the core cavity of the pineapple slice with mayonnaise.  Sprinkle with cheese.

Serve as an appetizer salad alongside other comfort family heirloom recipes.

Since Muffin ate a kid-friendly version of the salad, I consider this one Muffin Approved.

Muffin Approved

What is your favorite family heirloom recipe?